

How to Deploy a FullStack NodeJs and Express App on Vercel
A full guide on deploying your fullstack MERN app on Vercel, covering everything from deploying your Express API to connecting it with the frontend


Hello there, Welcome back to my page. Whether you're a returning visitor or visiting for the first time, Voila! I'm more than thrilled to have you here. Recently, I completed a full-stack project named "Talku-Talku".
Although after sharing it with my peers and the public in general, some developer friends of mine informed me that they struggled with deploying the project. As a result, I decided to write this insightful article on deploying a MERN stack project using Vercel. If you're interested in learning how to deploy a full MERN stack app on Vercel, you're right at the spot. Please join me and let's dive right in.
Introduction
Deploying a full-stack NodeJs and Express app on Vercel can seem daunting, especially if you're new to web development. But don't worry! With the right guidance and a fun analogy like I always use, you'll be able to deploy your app in no time.
Imagine that your app is like a pizza. You have all the ingredients (code) ready, and now it's time to bake it and serve it to your customers (users). Vercel Here! Let's take it as a pizza oven – it takes care of all the technical details so that you can focus on making a delicious pizza (bakes the pizza so it can be served to consumers or customers).
In this article, we'll walk through the steps of deploying your NodeJs and Express app on Vercel. And we'll cover everything from setting up your environment to configuring your deployment settings. Ace Up, Let's get started!
First Step: Setting up your environment
Before we dive into deploying our app, let's make sure we have the right tools installed. Here are some of the most important things you'll need:
Node.js and npm: You can download and install Node.js from the official website. Npm comes bundled with Node.js.
Git: This version control system will help you keep track of changes to your code. Download Git from the official website.
A code editor: Choose a code editor that suits your preferences. We recommend Visual Studio Code, which is free and easy to use.
Express.js: The popular web framework for Node.js, It provides several features such as routing, middleware support, and template engine integration, making it easier for developers to build server-side applications and APIs.
Once you have these tools installed, you are one step ahead and almost ready to go. Open the terminal and navigate to your project folder by typing
cd path/to/your/folder
Ensure that both the client and server of your application are ready for development, add another terminal for the server, navigate its server path and run both servers, Your server needs to be connected to your database and listening on the specified port(check out my article to get more insight on connecting your app to a database), while your client should be accessible through the browser on your localhost.
Now that we have our environment set up, let's move on to deploying your app on vercel.
Second Step: Kicking off deployment on Vercel
Now that we have our app up and running locally, it's time to deploy it to Vercel. Here's what you need to do:
Sign up for a Vercel account: If you don't already have a Vercel account, sign up at https://vercel.com/signup.
Install the Vercel CLI: The Vercel CLI is a command-line tool that makes it easy to deploy your app. Install it by running the following command in your terminal:
npm install -g vercel
- Log in to Vercel
Deploying the Backend or API of your MERN application:
Step 1: Log in to Vercel dashboard and click on the “Add New…” button and select the “Project” category. As you can see here, I'm already logged in and I have quite a number of projects with vercel already deployed.
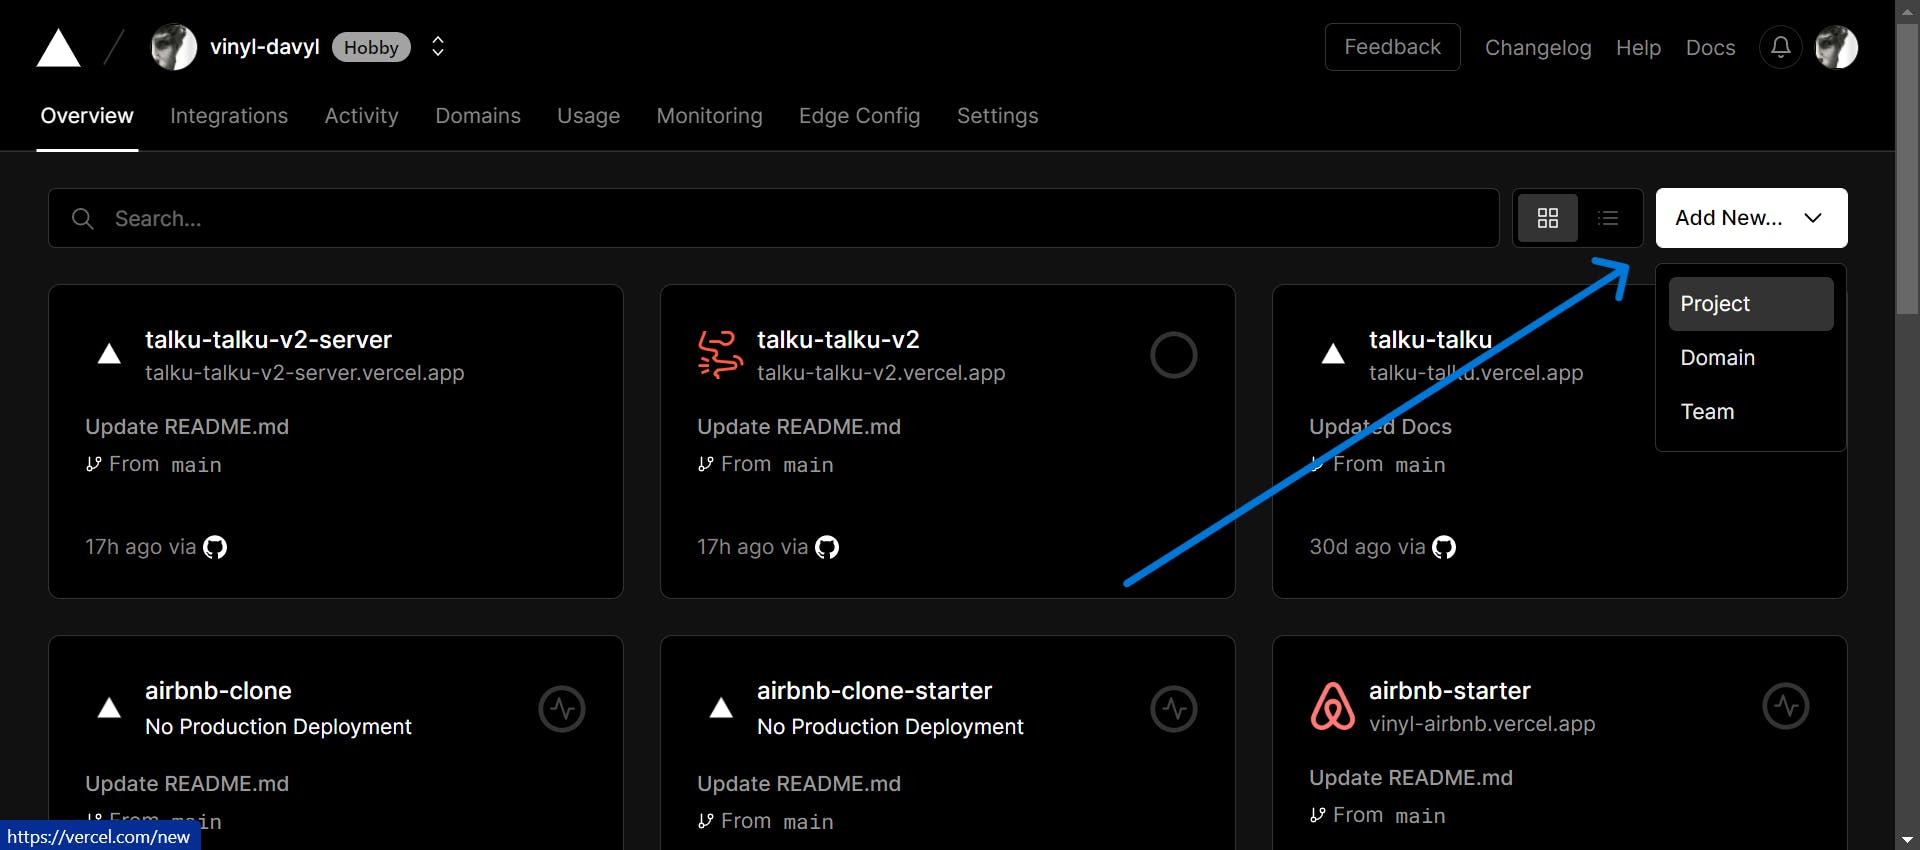
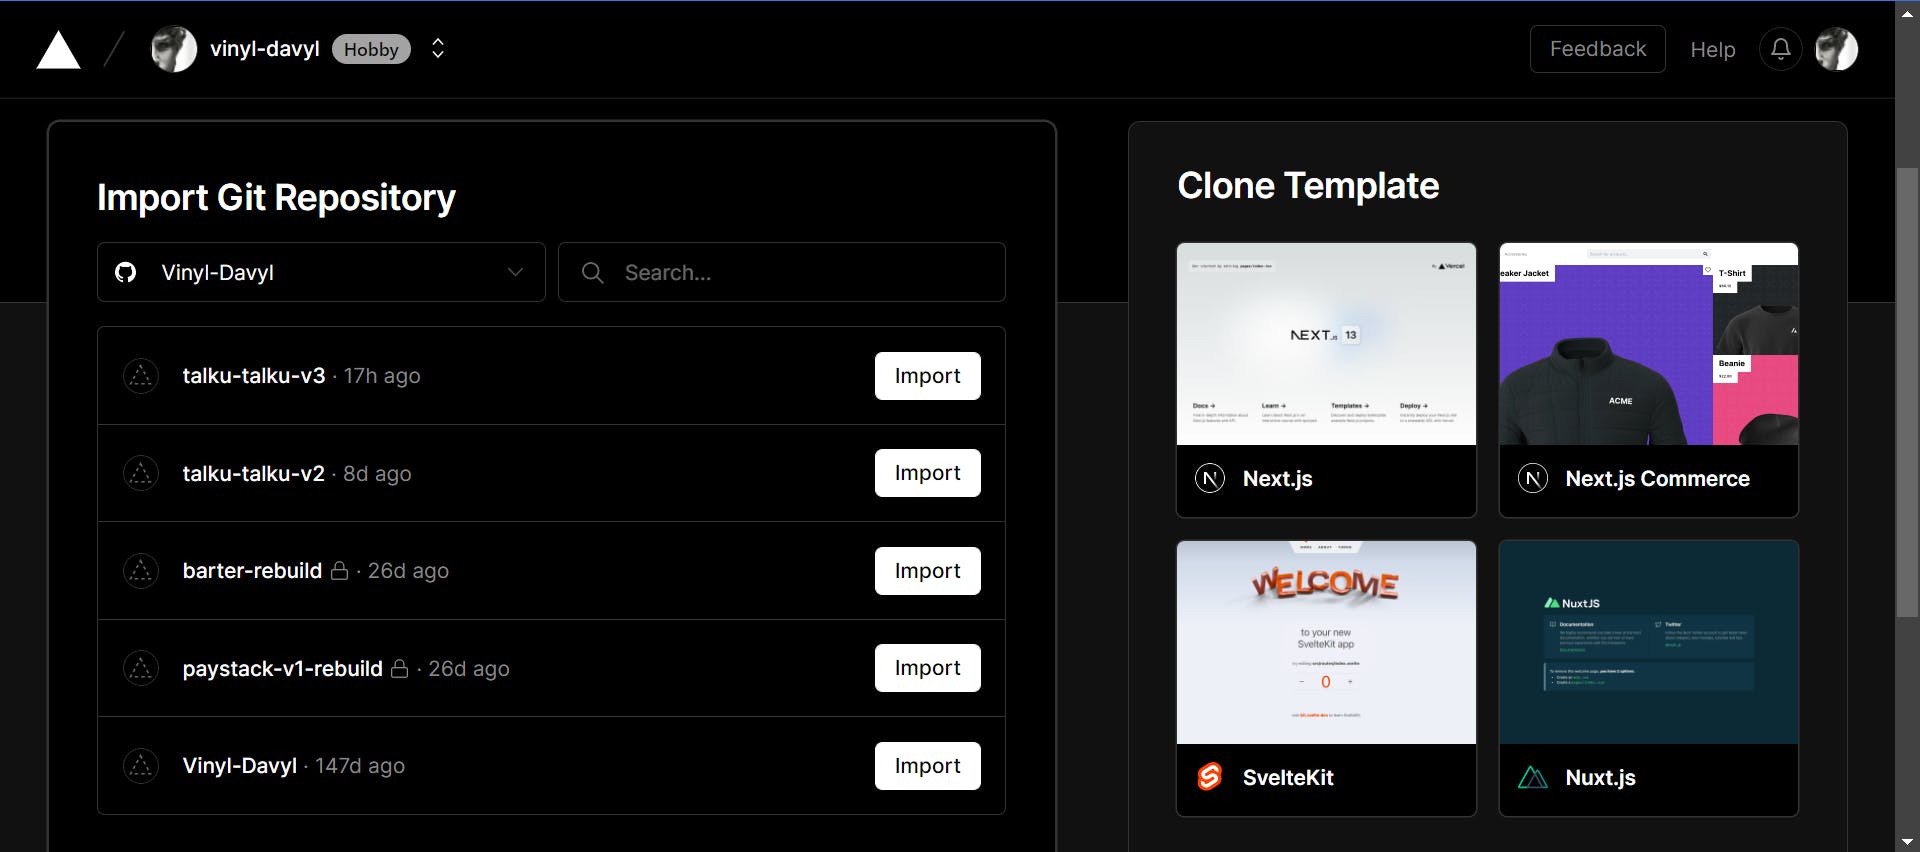
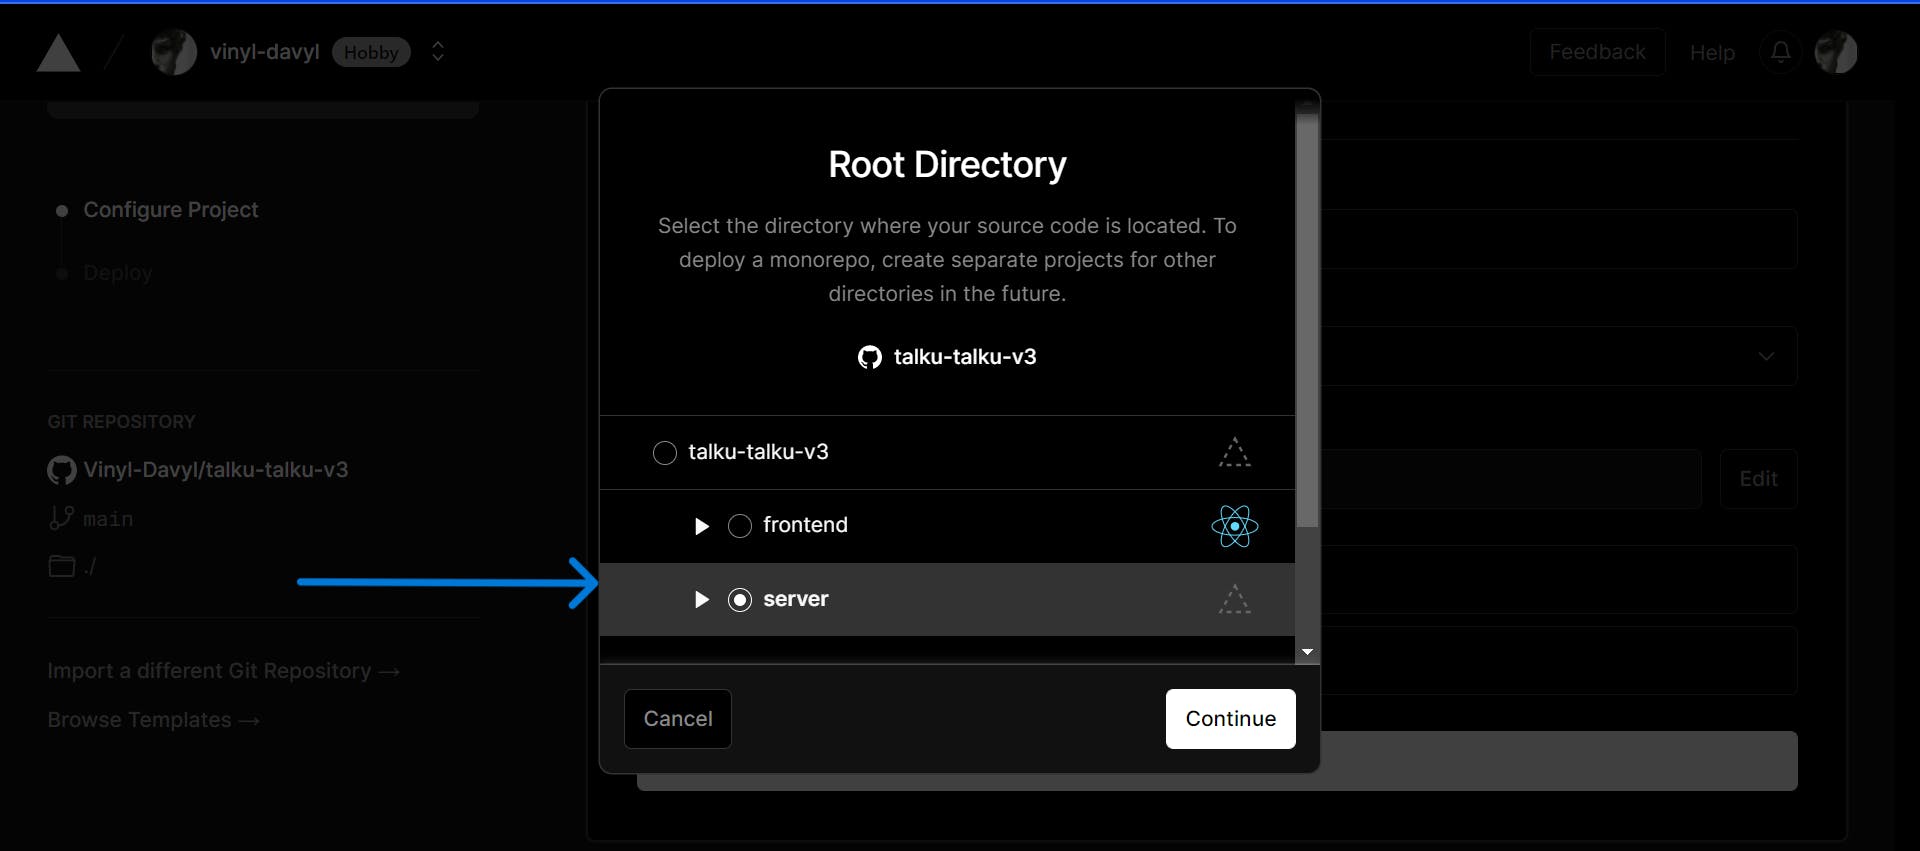
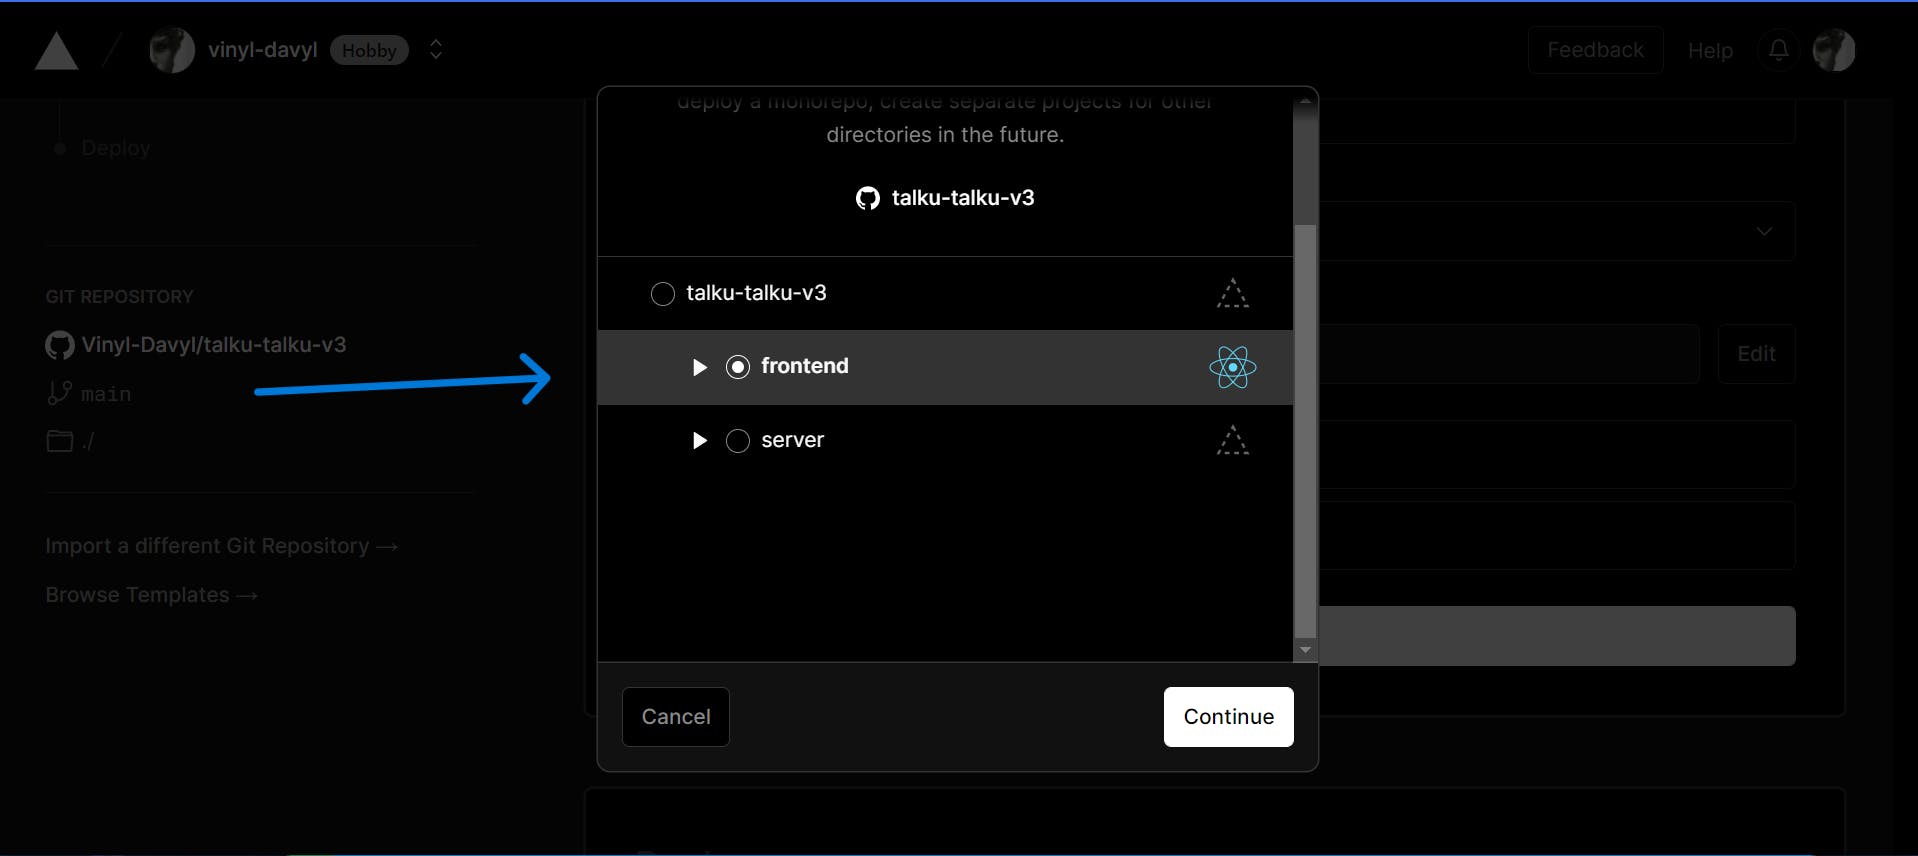
Step 2: Import your Git repository after linking your Github/Gitlab/BitBucket account with Vercel, In this case, we would be working with "talku-talku-v3" for this article.
Step 3: Configure the backend/server for your MERN application on Vercel
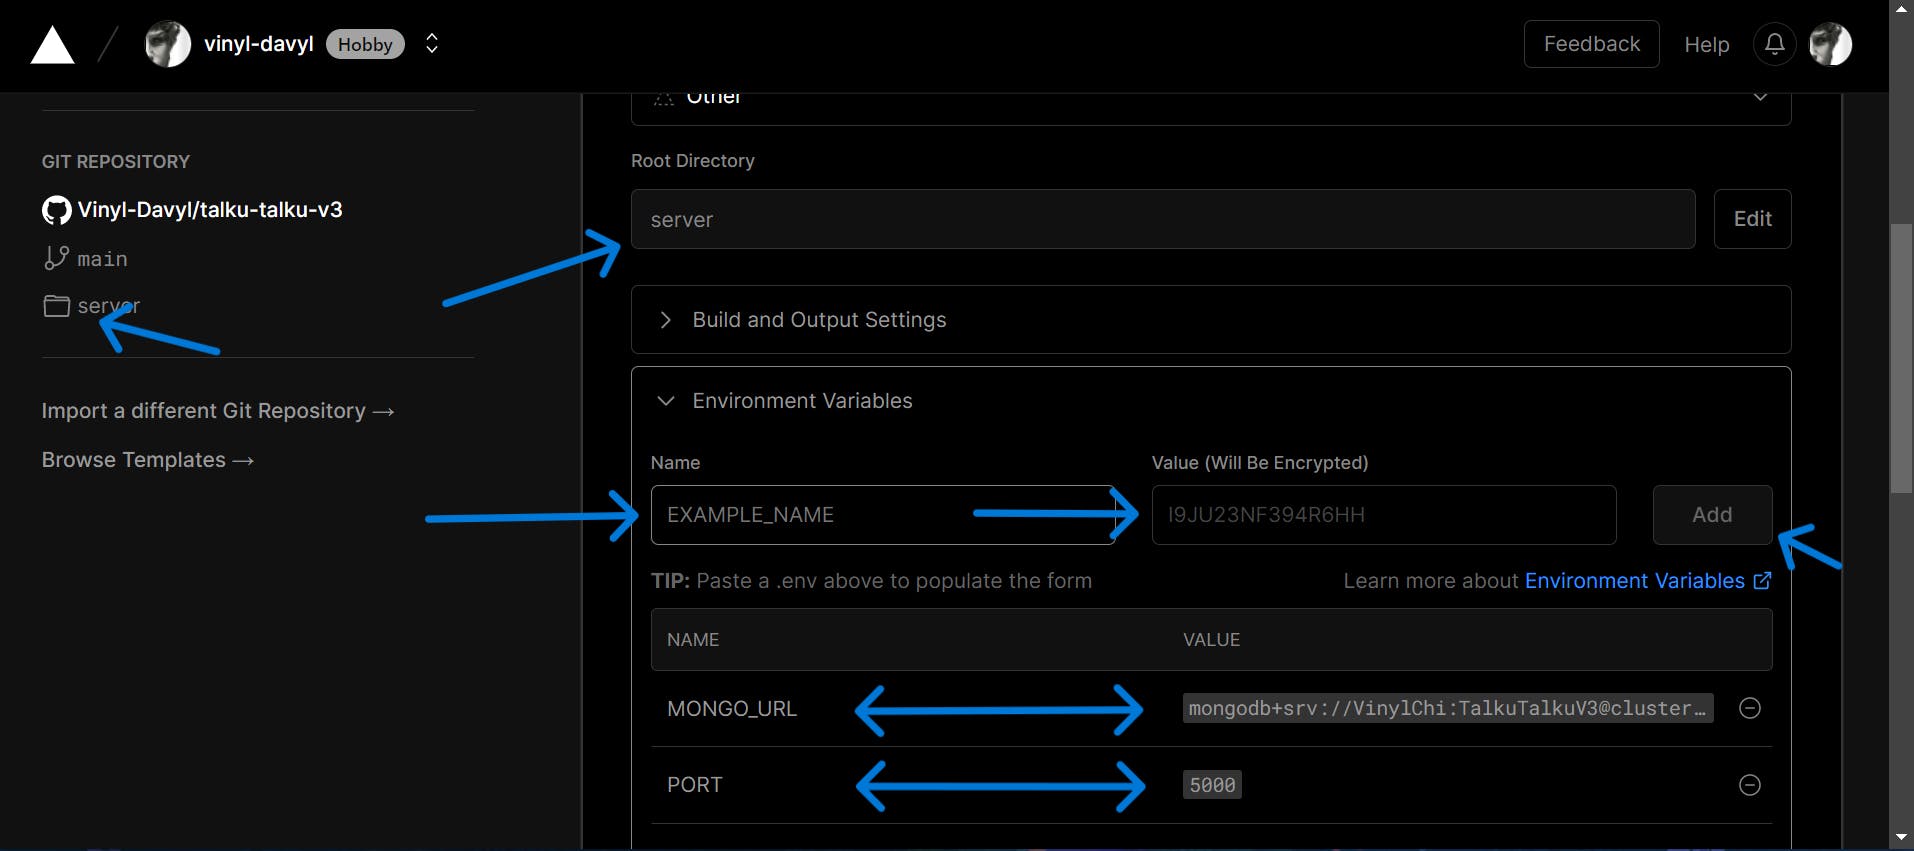
- Name your project, such as "my-project-backend"
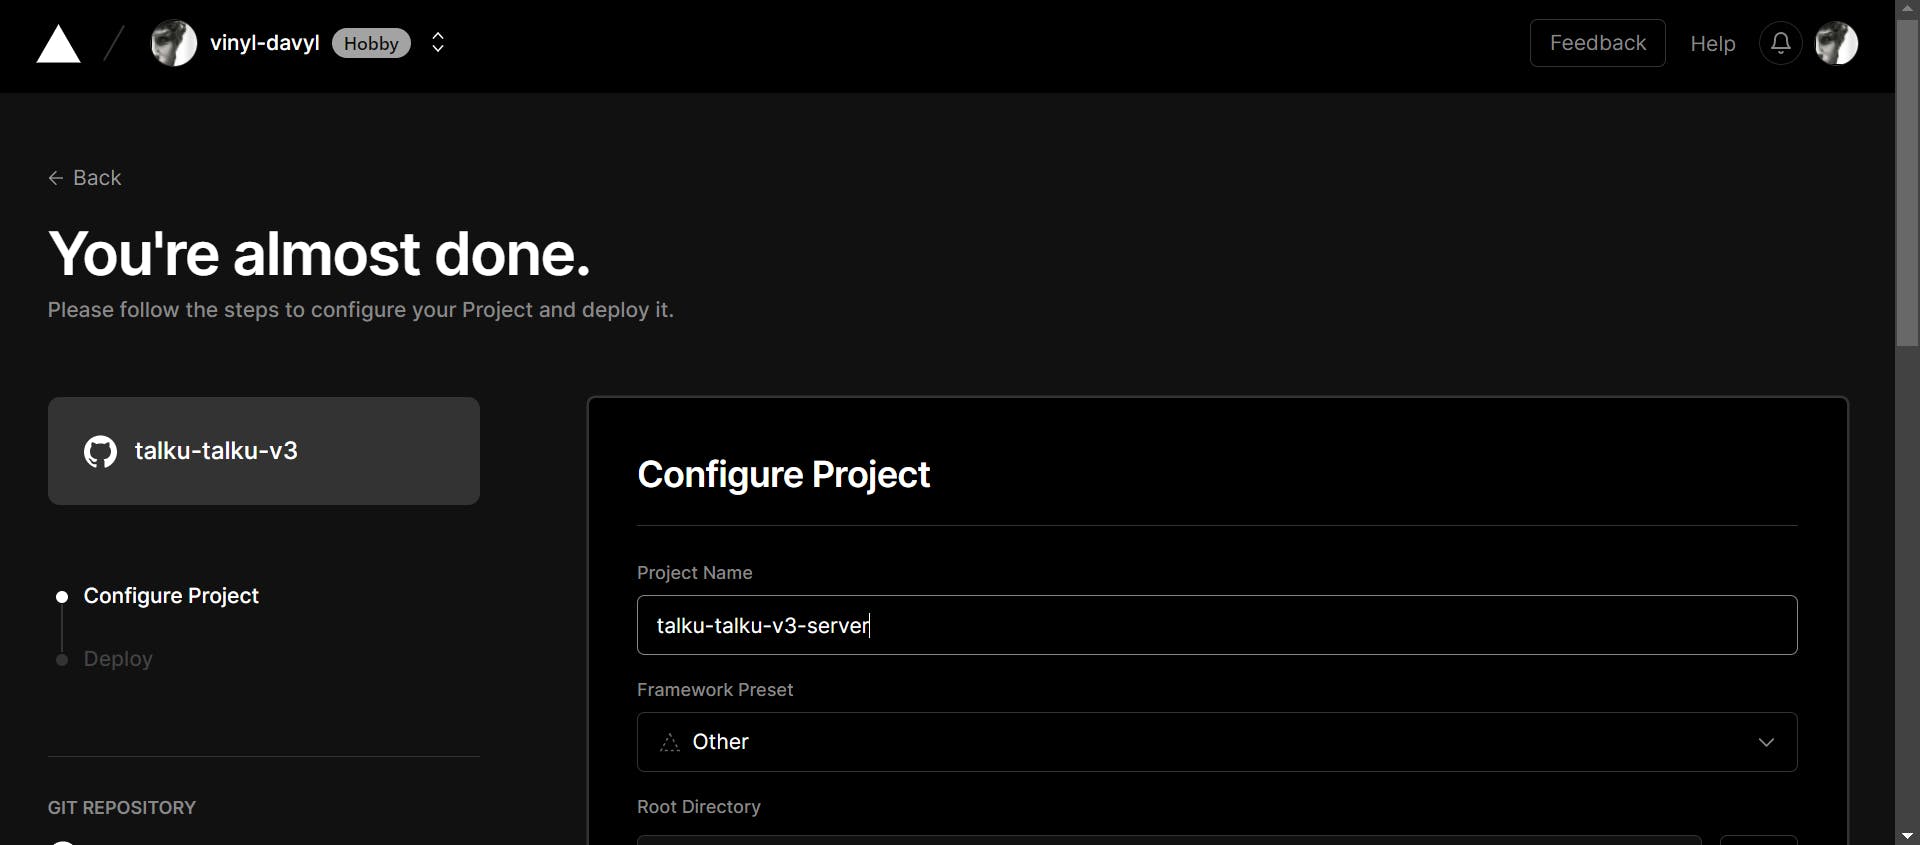
Select "Other" in the framework option to tailor the setup and customization process to Node.js.
Indicate the backend directory of your project where Vercel will run the build command.
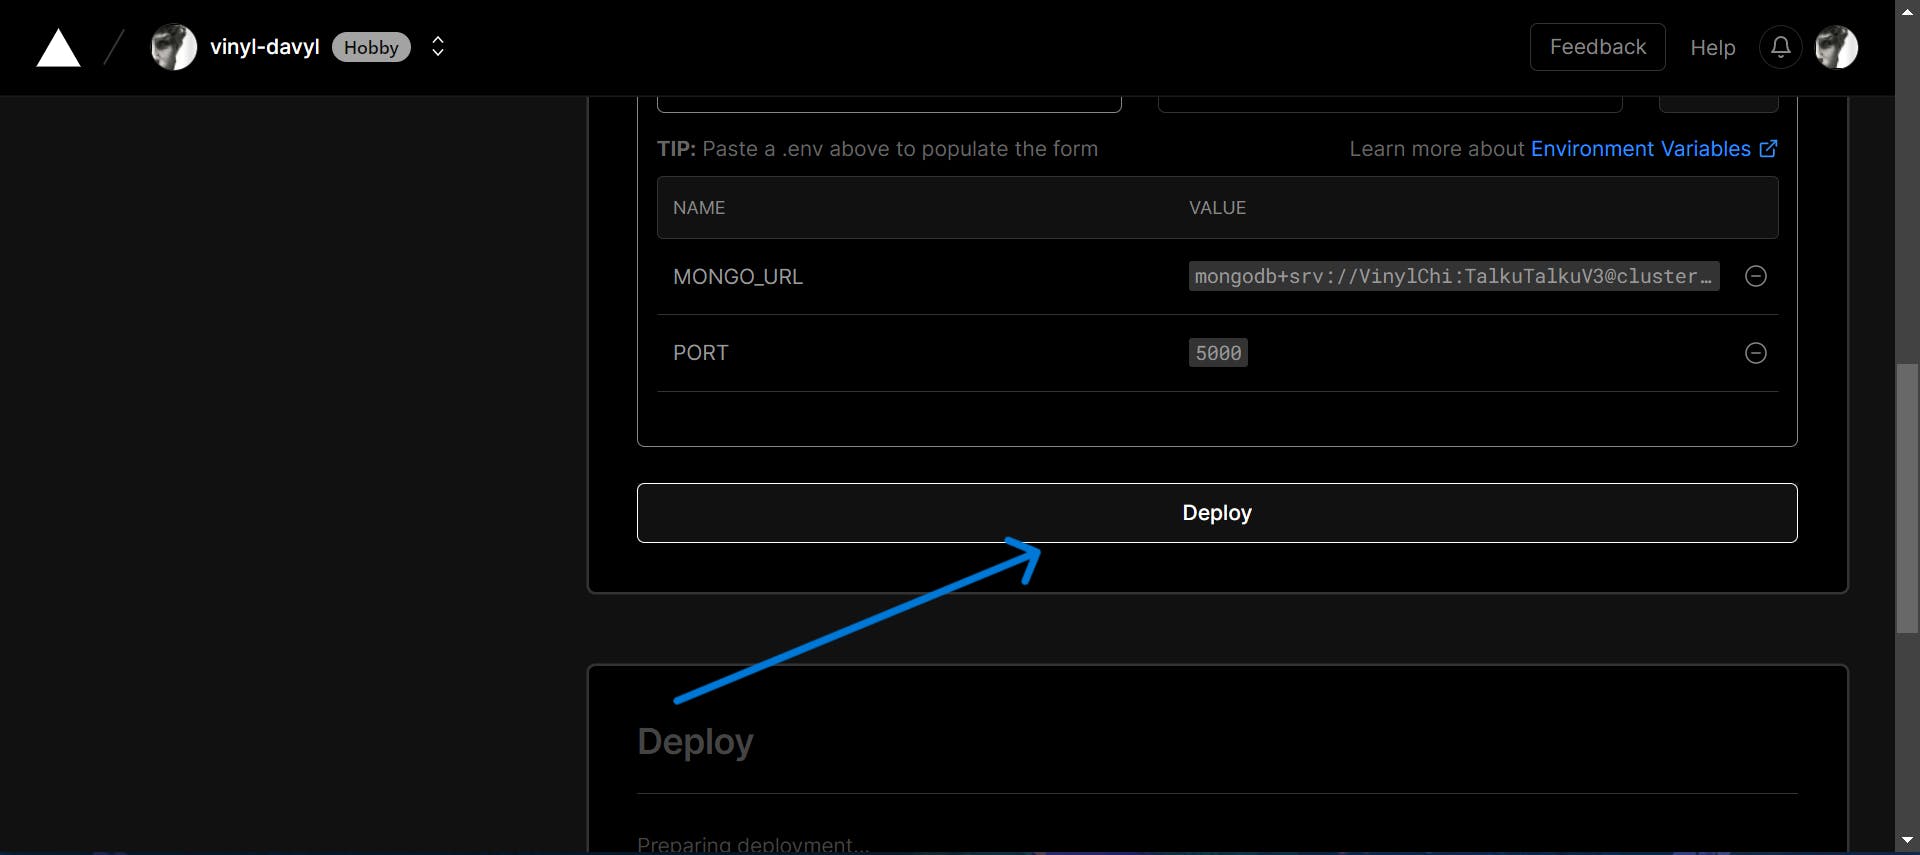
Add any necessary environmental variables, such as MONGO_ATLAS_URL: my-mongo-atlas-url. Note: There could be more than one!
Finally, click on the "Deploy" button.
Step 4: Very Important, Include the provided vercel.json file in your backend/server root directory and then push it to your remote repository. This will enable Vercel configuration.
{
    "version": 2,
    "builds": [
        {
            "src": "*.js",
            "use": "@vercel/node"
        }
    ],
    "routes": [
        {
            "src": "/(.*)",
            "dest": "/"
        }
    ]
}
**Congratulations!**🎊 Your backend will be up and running within a few minutes after deployment. You should see something like this.
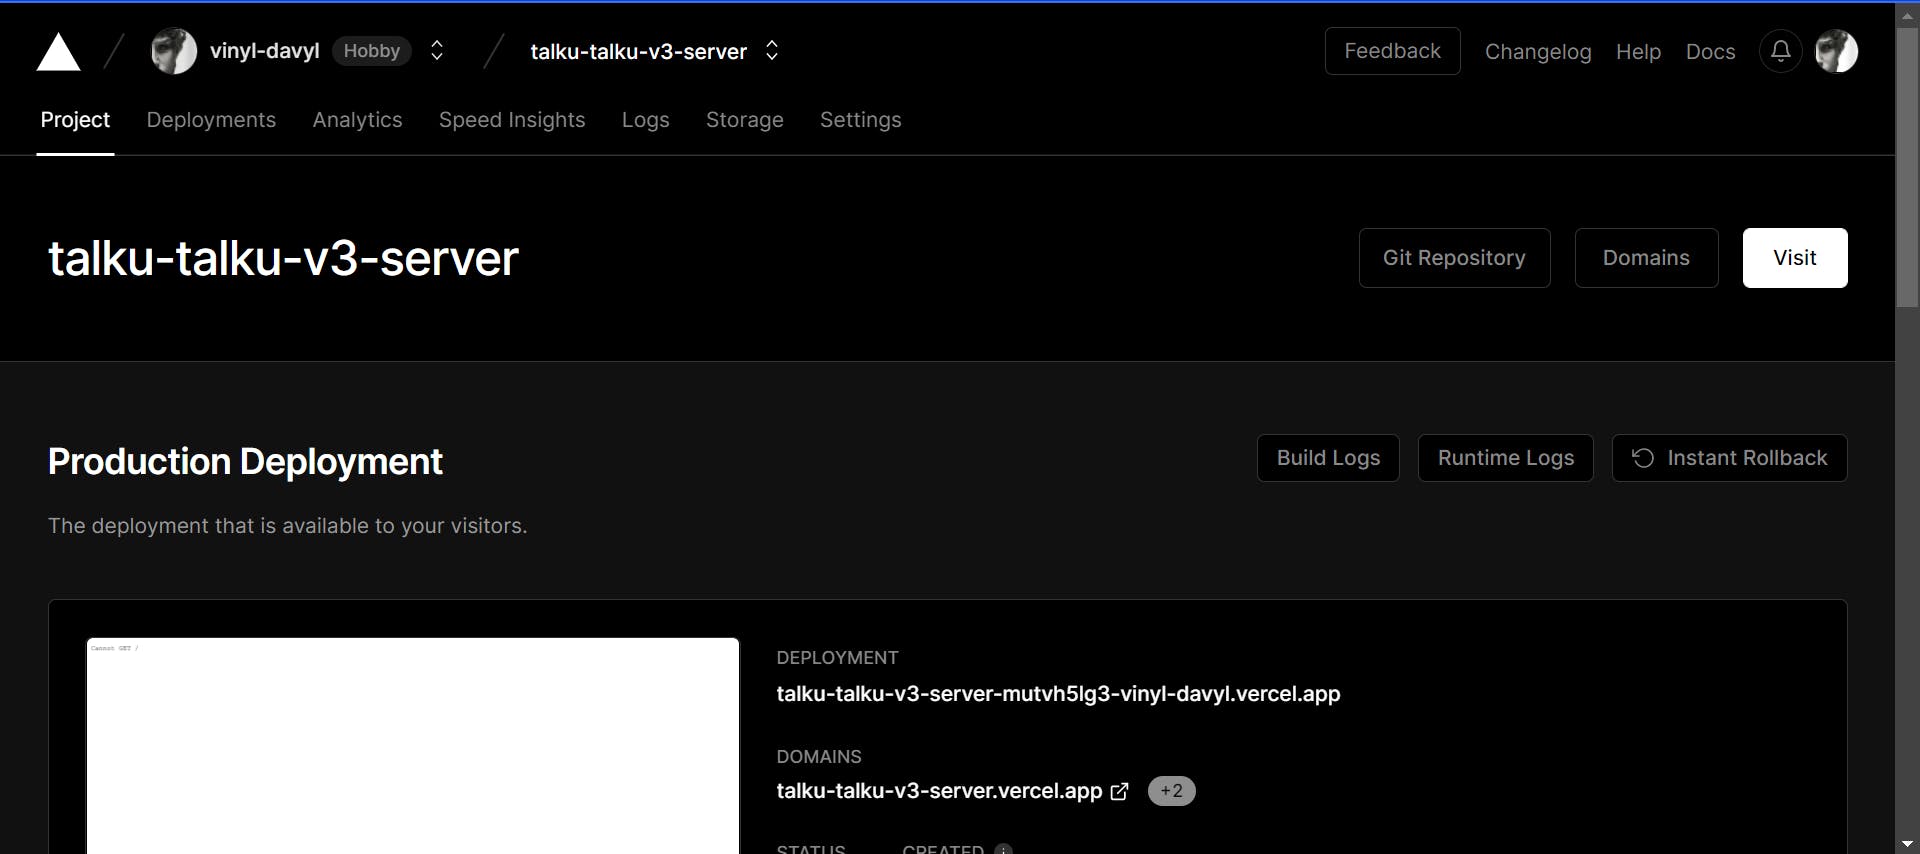
Quick Note: As soon as possible, don’t forget to save the new deployment link of your server. "https://talku-talku-v3-sever.vercel.app" in this case, and replace it in your code wherever the local server link was provided.
Deploying the Frontend of your MERN application:
Quite similar to the backend deployment of our app, we follow the same process.
Step 1: Once again, Go to Vercel dashboard and click on the “Add New…” button and select the “Project” category.
Step 2: Import your Git repository after linking your Github/Gitlab/BitBucket account with Vercel, In this case, we would are definitely working with "talku-talku-v3" for this article.
Step 3: Configure the frontend for your MERN application on Vercel
Name your project, such as "my-project-frontend"
Choose "Create-React-App" from the available frameworks to ensure that the configuration and modification procedures are tailored for React.js.
Indicate the frontend directory of your project where Vercel will run the build command.
Add any necessary environmental variables, such as REACT_APP_LOCALHOST_KEY: chat-app-current-user. Note: There could be more than one and you might want to consider adding GENERATE_SOURCEMAP: false for security and performance reasons.
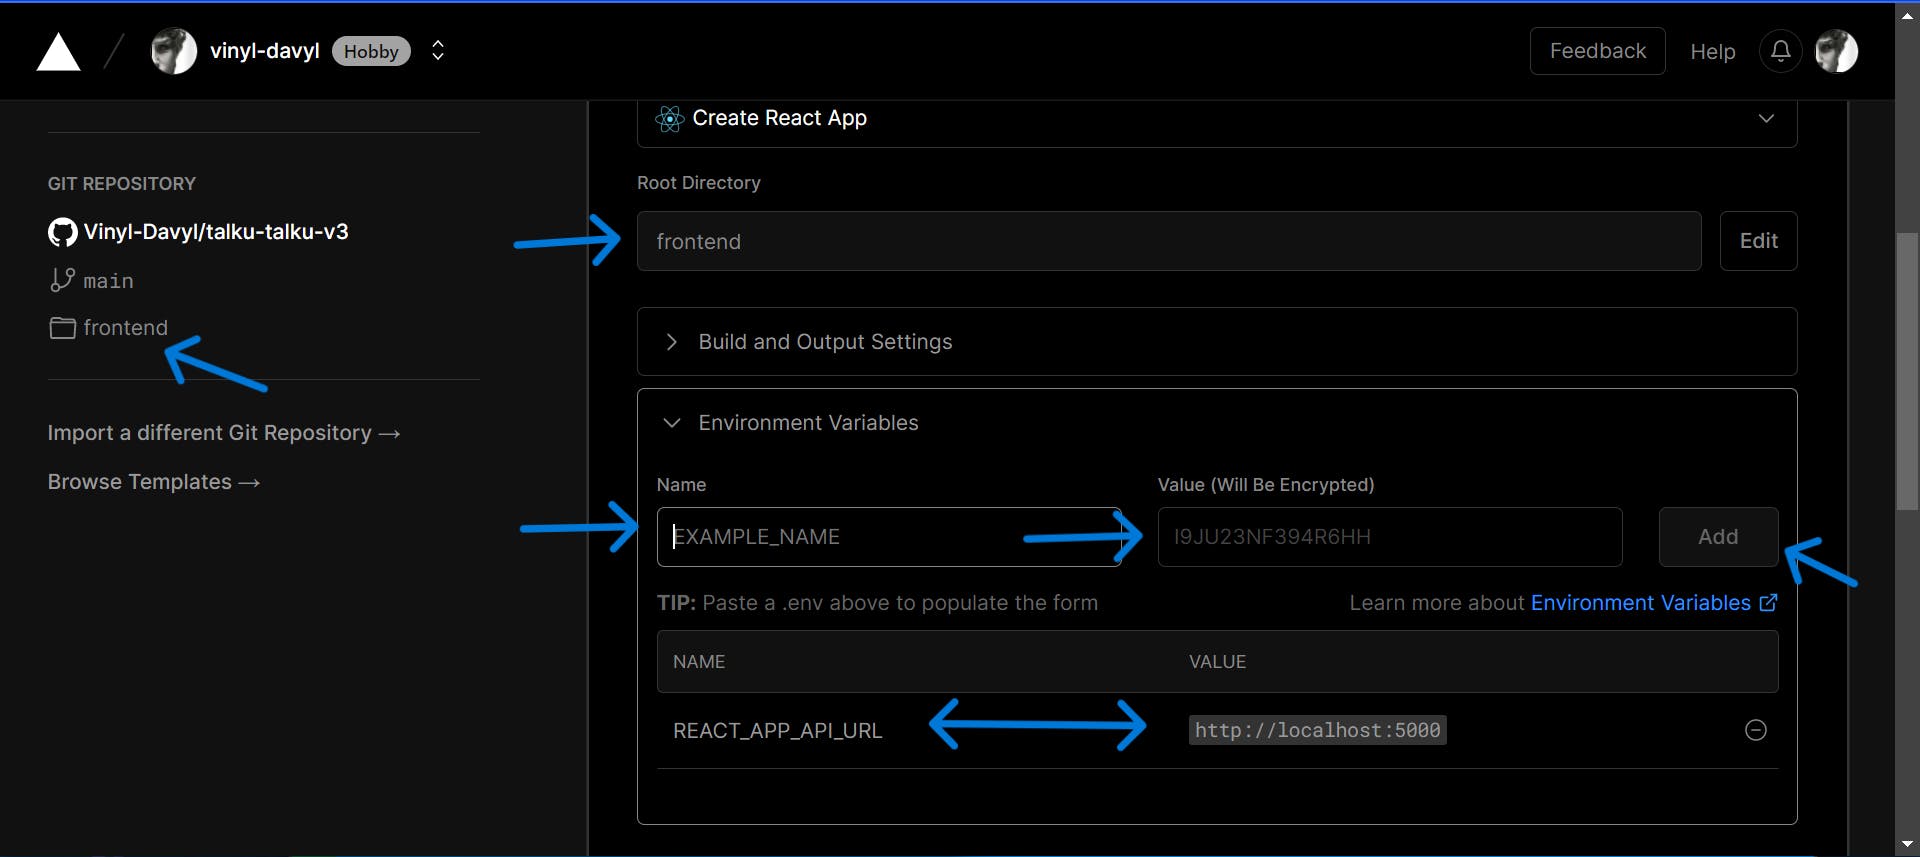
Finally, click on the "Deploy" button once you're done.
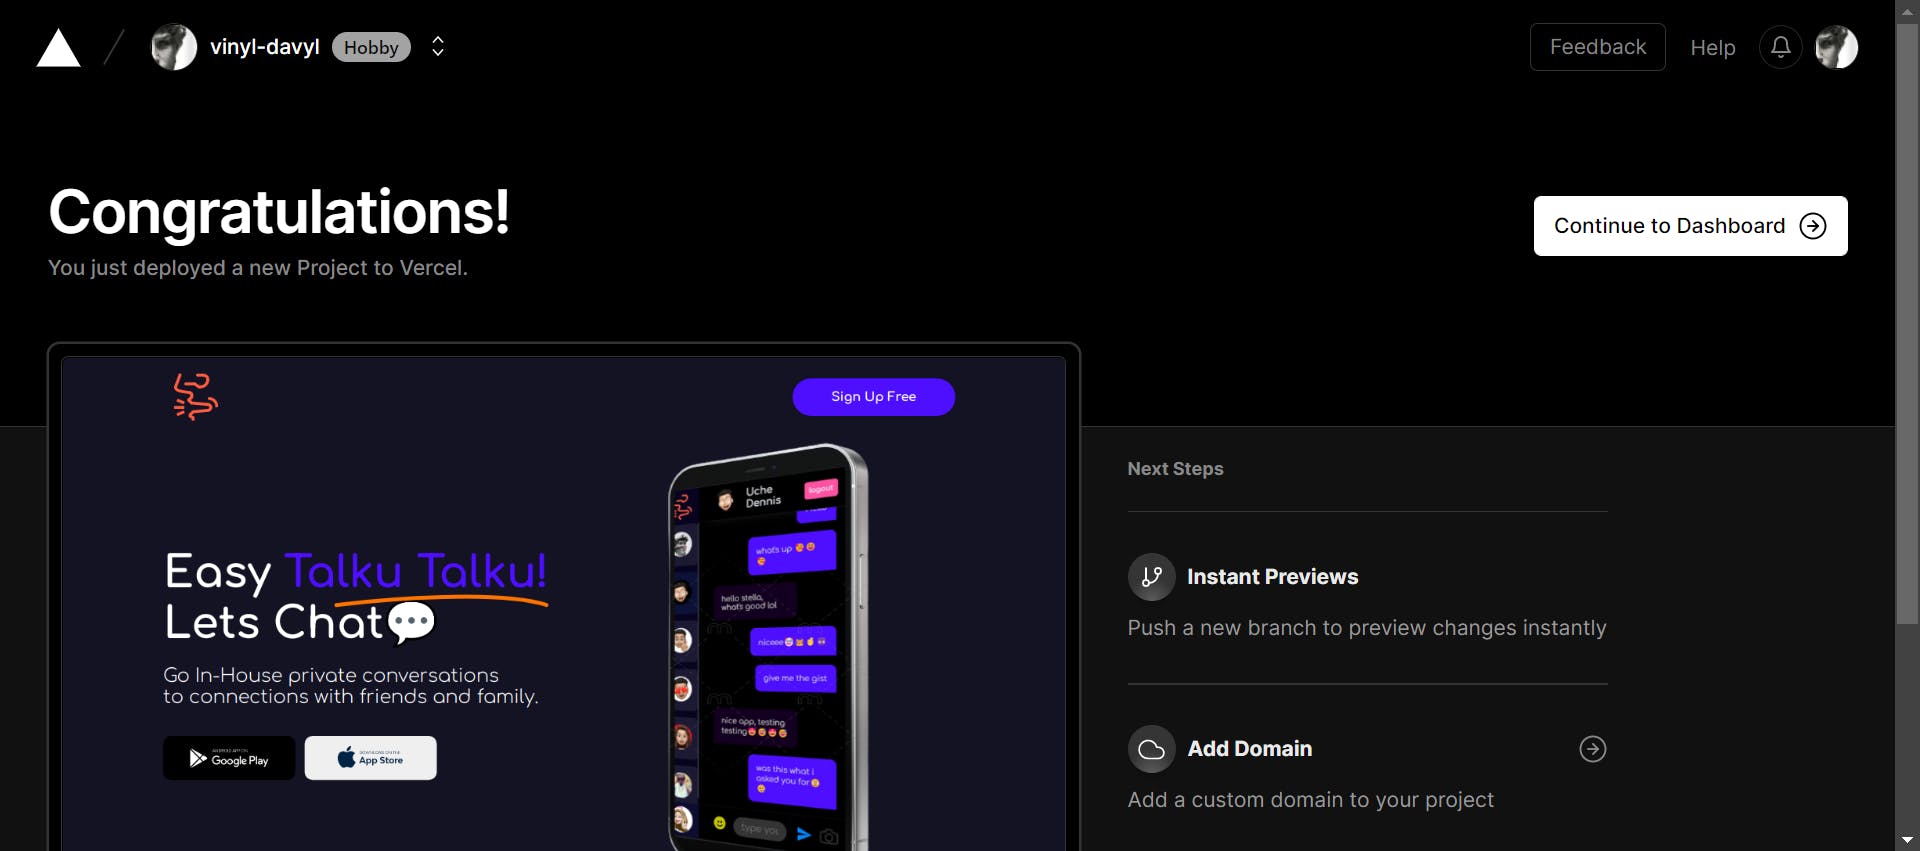
**Congratulations!**🎊 Your frontend will be up and running within a few minutes after deployment. You should see something like this.
Finally, Checking and Allowing CORS policy after deployment
Note: To solve for CORS policy error if one eventually comes up after deployment of your full-stack app, you can install the cors package and use it to allow cross-origin requests from other domains. This can be done by adding the following code snippet to your backend server:
const cors = require('cors');

// Allow all origins
app.use(cors());

// Allow specific origin(s)
app.use(cors({
  origin: 'https://yourdeployedsite.com'
}));
Additionally, you should always check the console for errors, including any CORS errors. This will help you identify and fix any issues that may arise.
Conclusion
Deploying a full-stack Node.js and Express app on Vercel doesn't have to be difficult. By following the steps outlined in this article and using the pizza analogy at the introduction of this article to get a clearer view, you can easily get your app up and running in no time.
After all that's been said and done, don't forget to check out "Talku-Talku-V3" on GitHub. Sign up to chat and send media with friends and foes! Share your review and feedback, and leave a star⭐️ if you find something interesting.
Overall, you should by now have a good understanding of the deployment process for a full-stack MERN app using Vercel, including common challenges and best practices, I sure hope so. Please do follow me for more content and updates like this in the future! Until we meet again.
Merci!!