
How to Create a Database in MongoDB Atlas and connect your Database to your Application (Step By Step)
Exploring and creating a Database System using MongoDB


MongoDB Atlas is a cloud-based database platform that makes it easy to create and manage MongoDB databases. In this blog post, we'll go through the steps of creating a database in MongoDB Atlas and connecting it to your application. And because I know you might expect more than just a technical tutorial, I'm going to use a fun analogy to help you understand better. Cool Right?🍧
Lol! Ace up, It would be a joy ride. Let's dive right in!
Creating a database in MongoDB Atlas is like building a sandcastle on the beach. You start with a blank canvas, a bucket and shovel, and lots of imagination. In the case of MongoDB Atlas, our blank canvas will be a new project on the MongoDB website, and the bucket and shovel will be the tools we use to create the database.
Step 1: Create a New Project
The first thing you need to do is create a new project on the MongoDB website. This is like finding a good spot on the beach to build your sandcastle. Sign up for an account if you haven't already, then locate the "New Project" button and give your project a name.
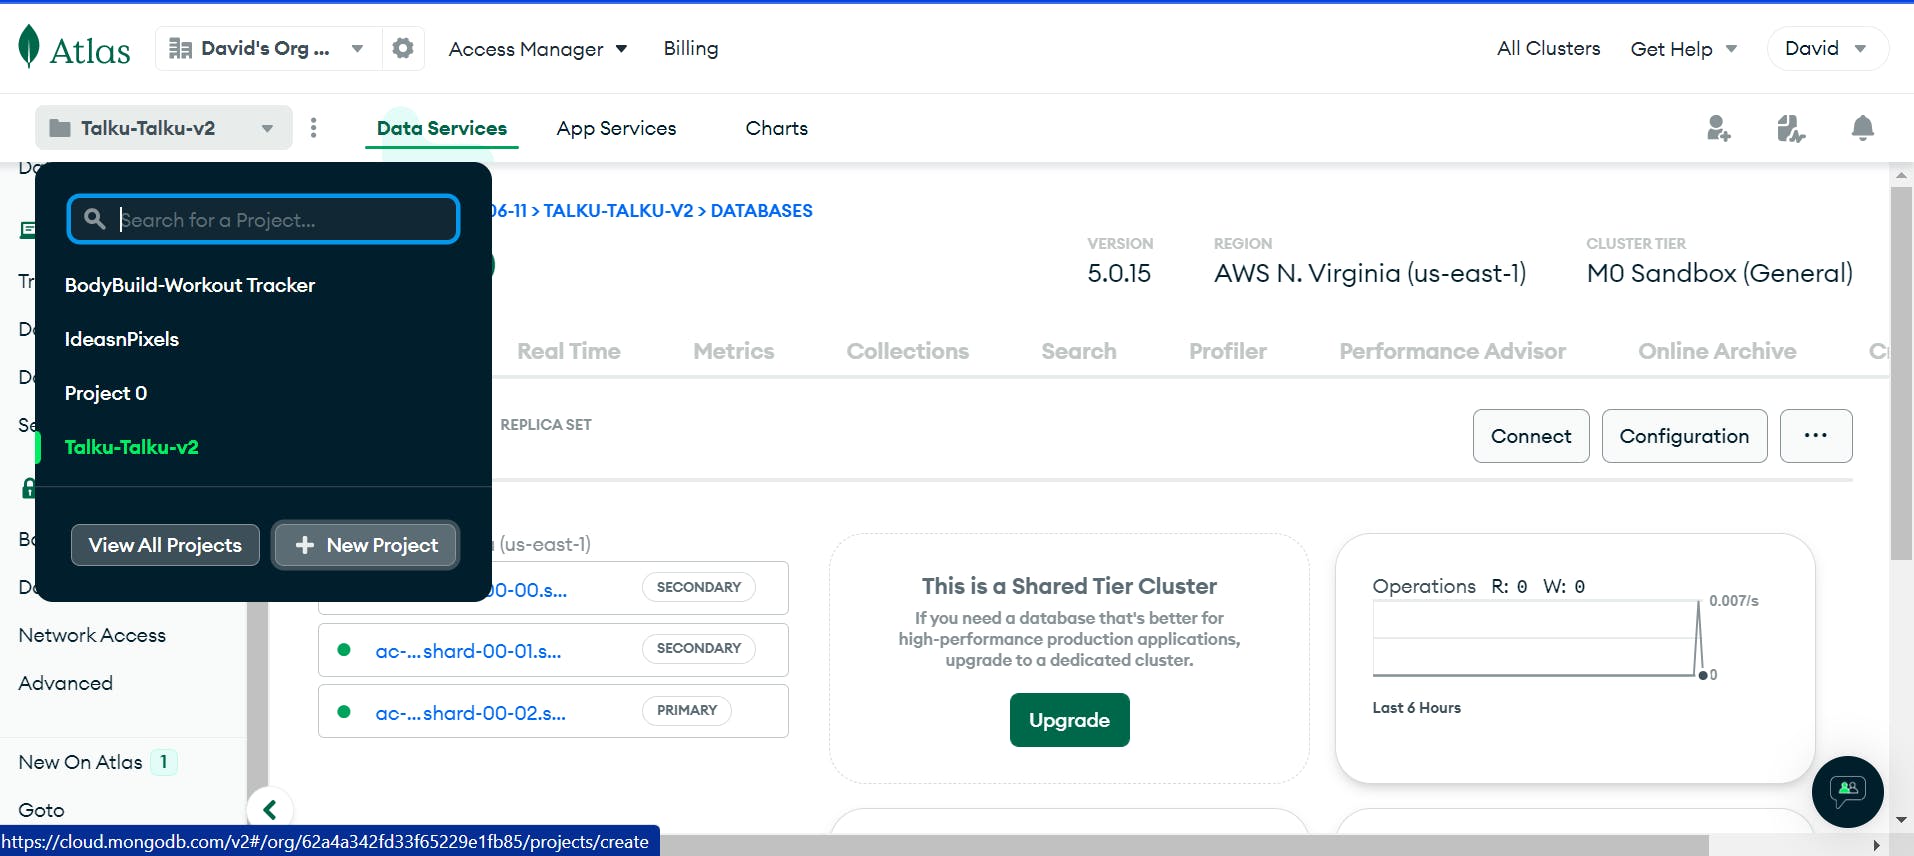
Just like I have here in the Image above, I'm just about to create a new project by clicking on the new project button beside view all projects.
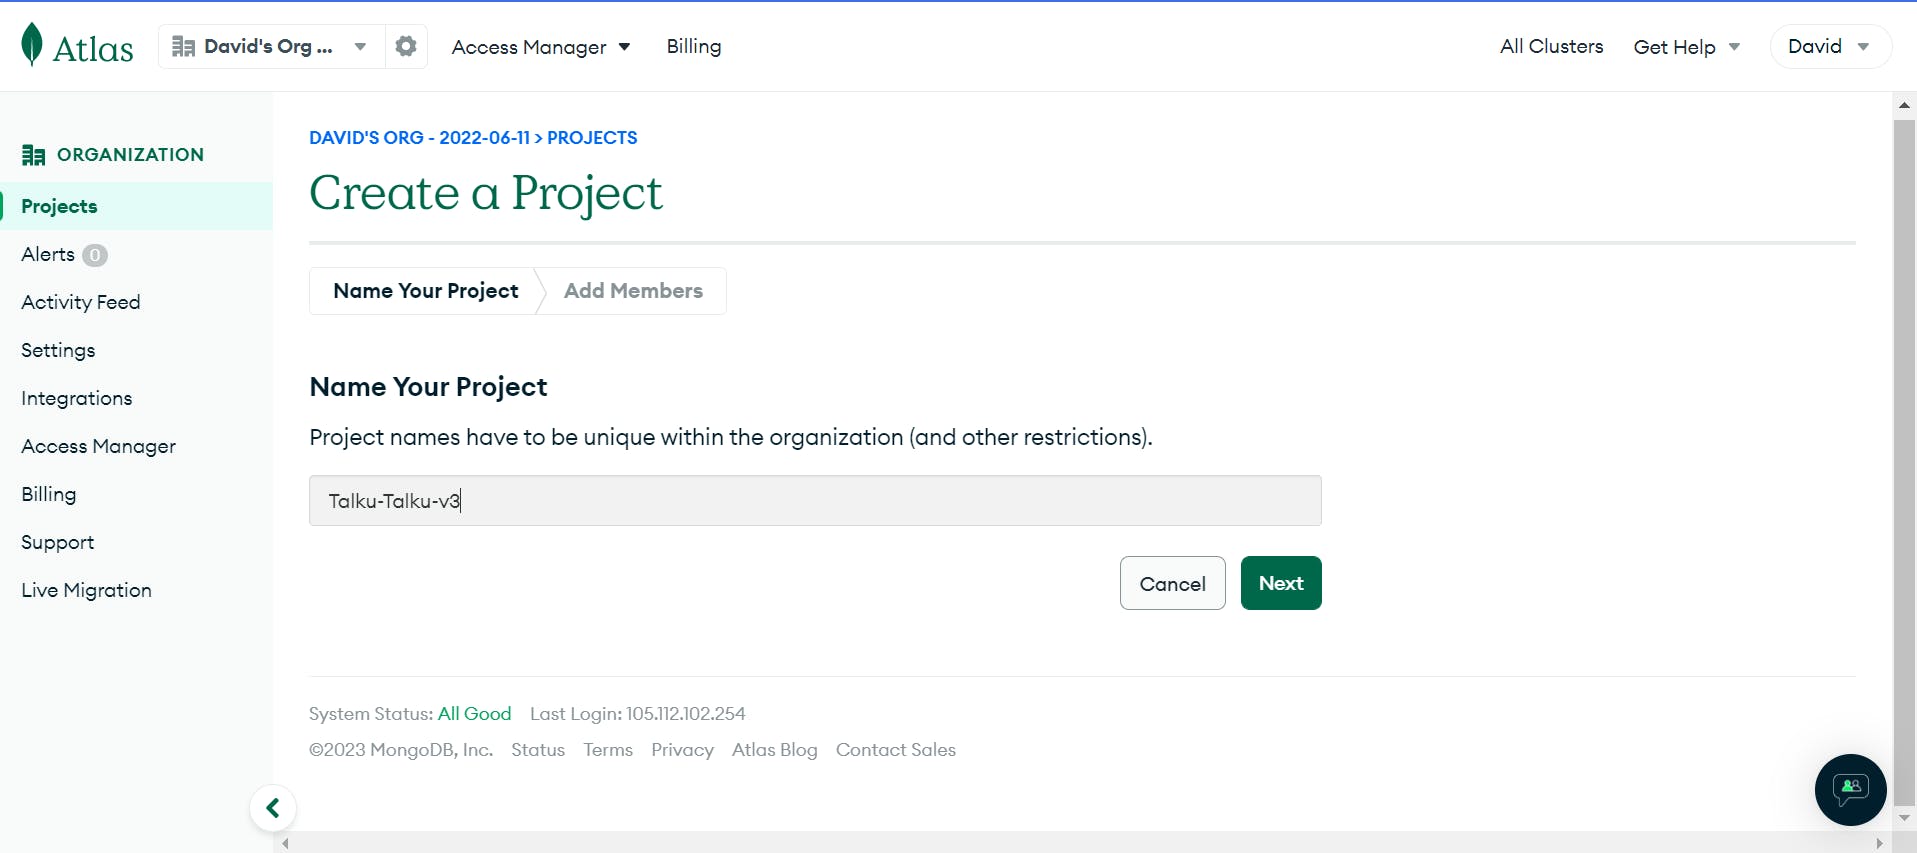
Then you move on to "Name Your Project" with the desired name of your project. In this sample here. I'm calling the name of my project "Talku-Talku-v3".
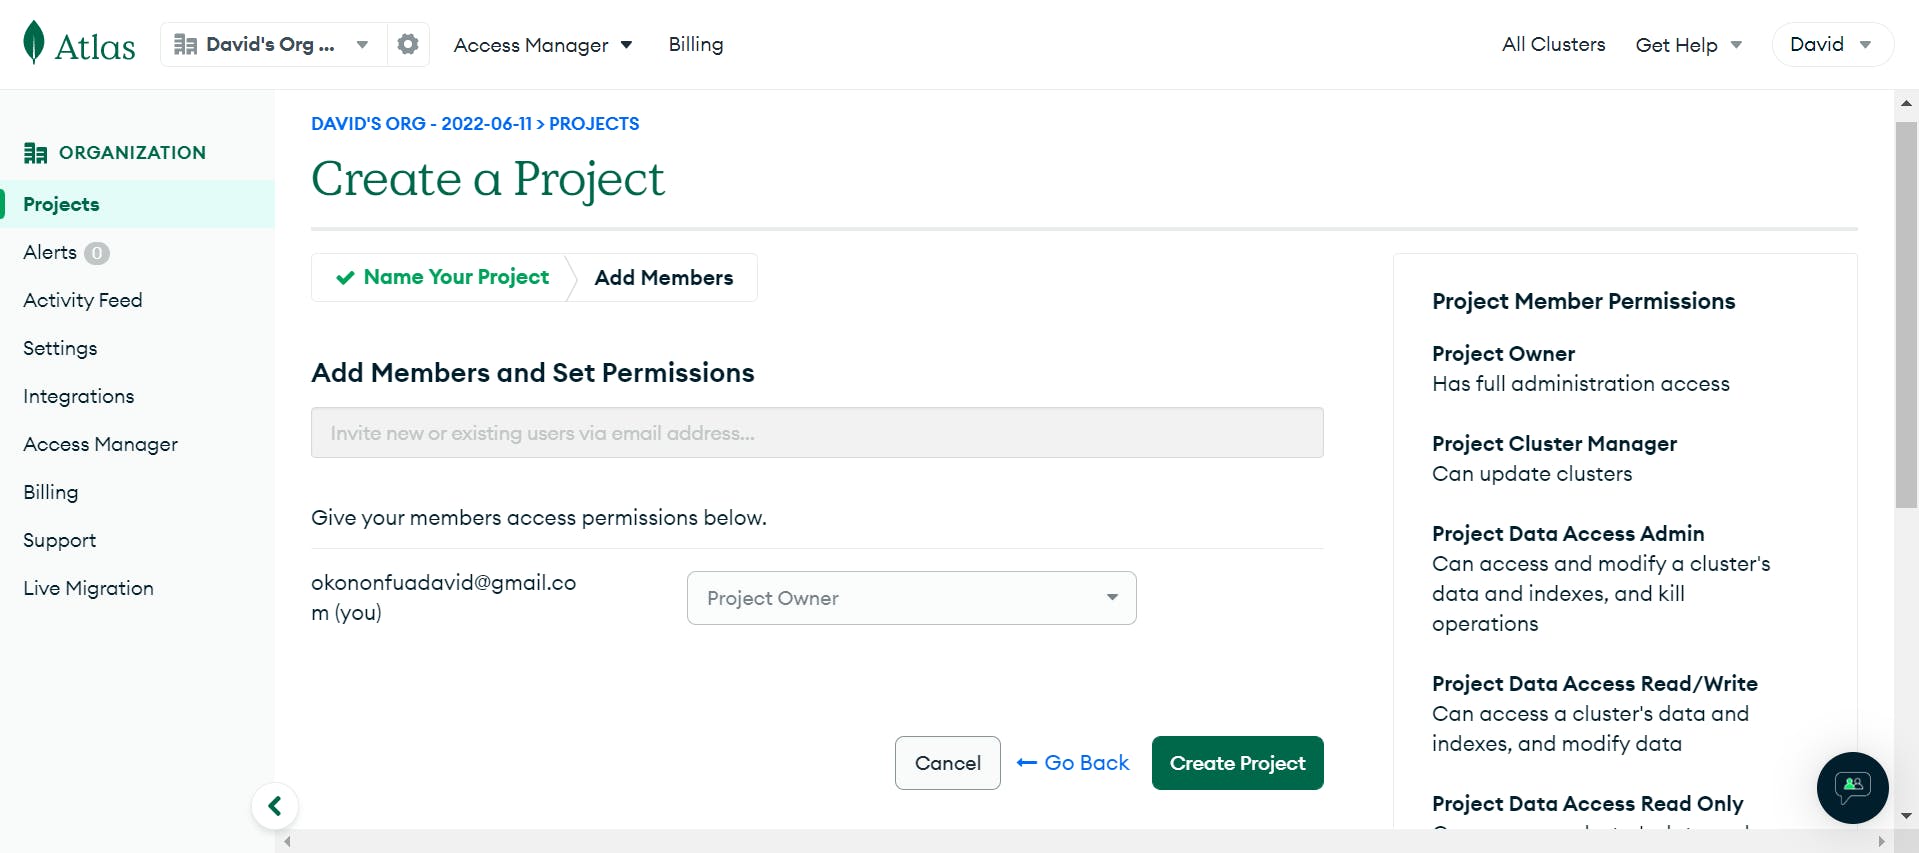
Next, You're prompted to this section here where you can basically add members and give permission to other users which technically makes them have read and write access to your project. But you can skip this and move on to "Create Project" for it's totally optional.
Step 2: Building Your Sandbox (Creating your Cluster or Database)
Once you have your project set up, you'll need to create a new cluster. Think of this as building the foundation for your sandcastle. Click the "Build a Cluster" button and follow the prompts to set up your new cluster. You can choose the type of cluster, region, and other settings that work best for your needs.
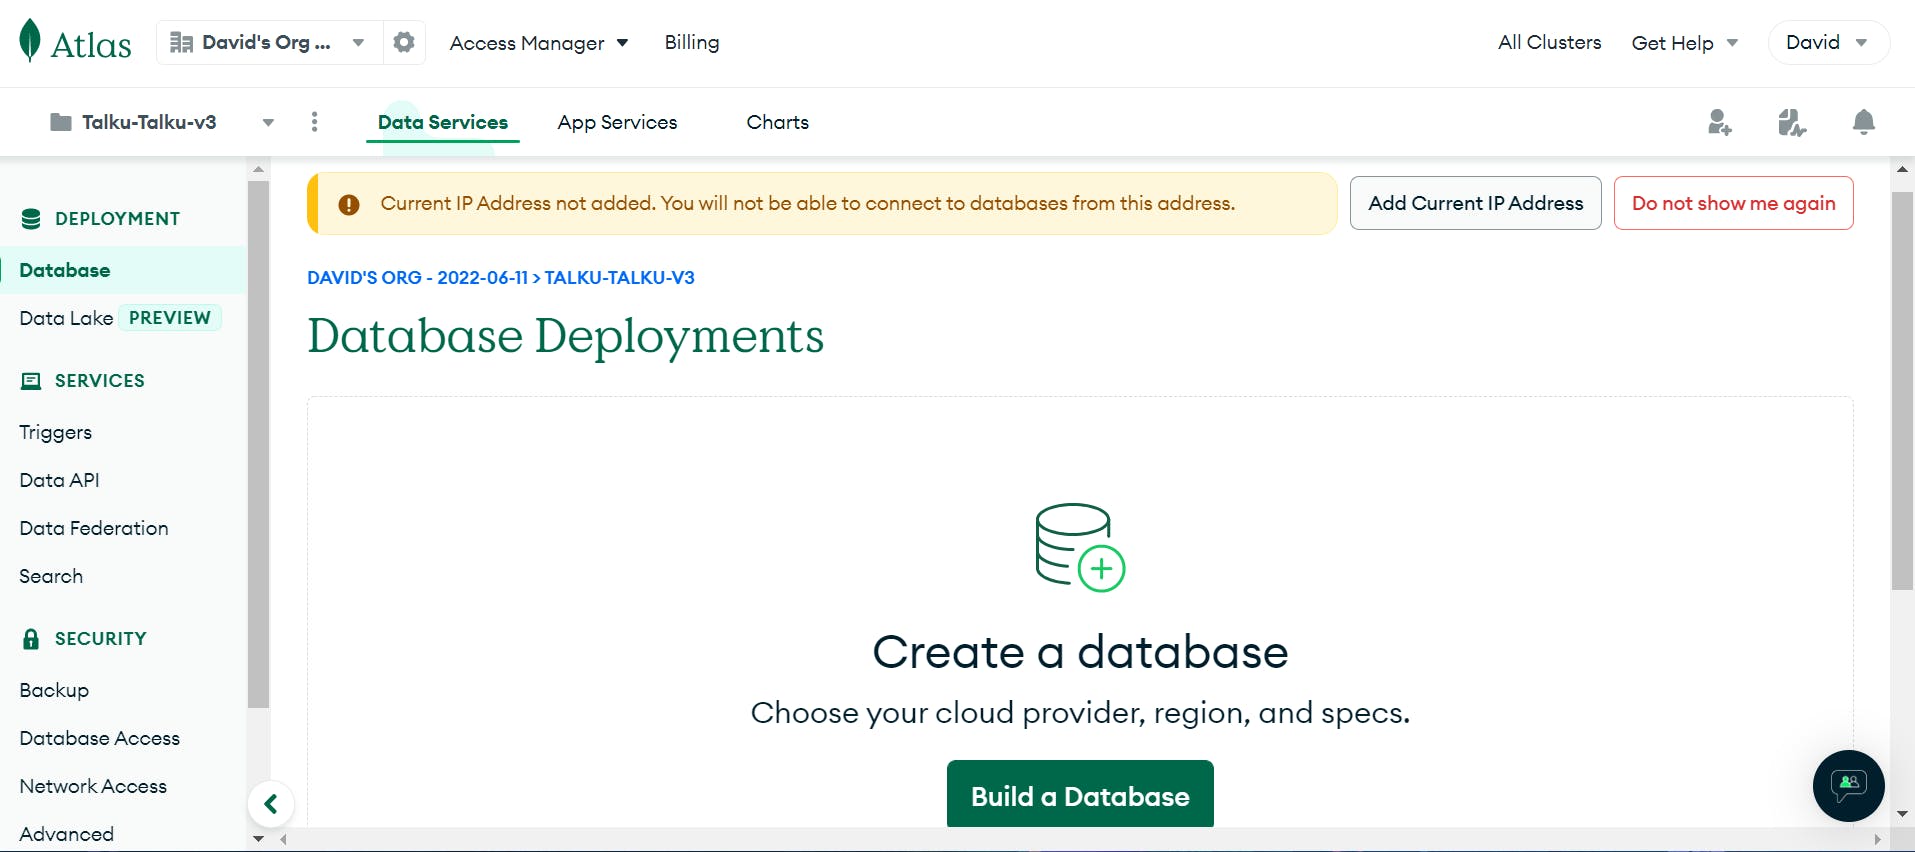
Note: In MongoDB, a cluster refers to a group of servers that work together to store and manage data. It is not the same as a database, which is a collection of organized data. Instead, a cluster can contain multiple databases, each with its own set of collections and documents. The purpose of a cluster is to provide high availability and scalability for MongoDB deployments. But in recent times, you would have to build a database first in MongoDB, and you can easily do that by clicking on the button "Build Database".
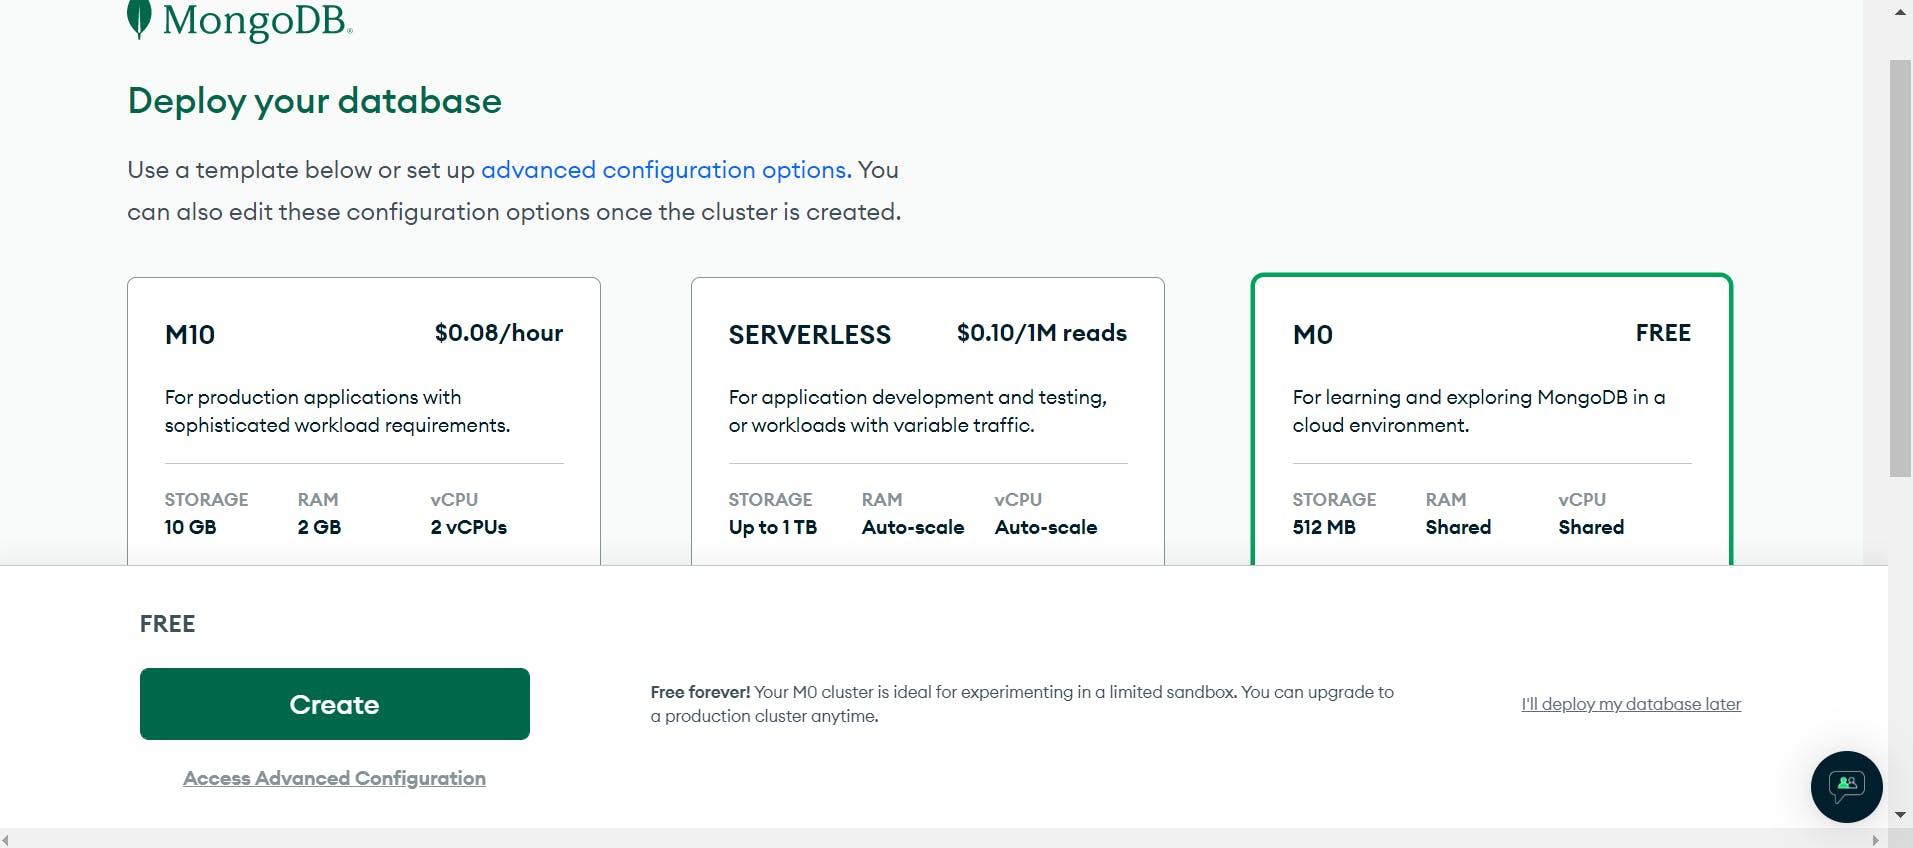
Then you would be prompted to do this! We would be using a free tier for the purpose of this article.
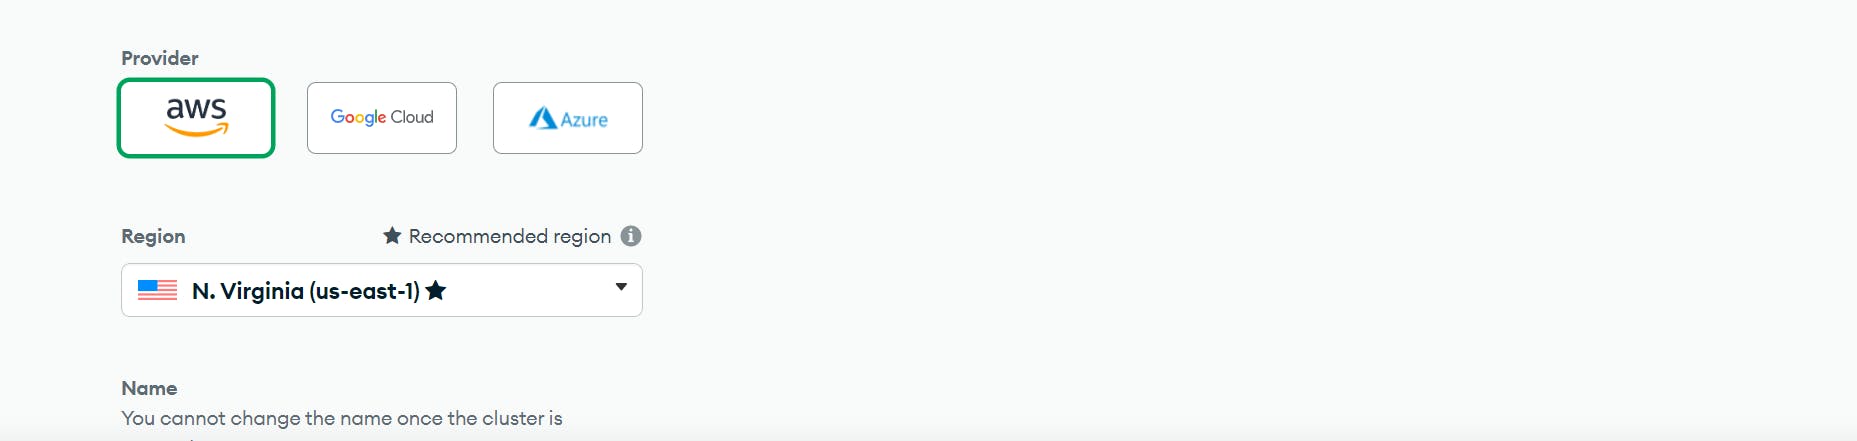
Then you select a provider or cloud platform, We would be using AWS in this case. Then select a region, I recommend selecting a region closest to you. Though, Northern Virginia works just well.
Step 3: Start Digging
Now it's time to start digging into the sand to create the shape of your sandcastle. In MongoDB Atlas, this means creating a new database for your application. Go to the "Database Access" tab, click "Add New Database User," and enter a username and password for your new database user.

Step 4: Building the Walls(Setup and Add an IP Address)
With your foundation laid and your sandcastle taking shape, it's time to build the walls. In MongoDB Atlas, this means creating a new database. Click the "Clusters" tab, then click "Add a Database." Follow the prompts to create your new database, including the database name, collections, and any required indexes and then add your IP Address.
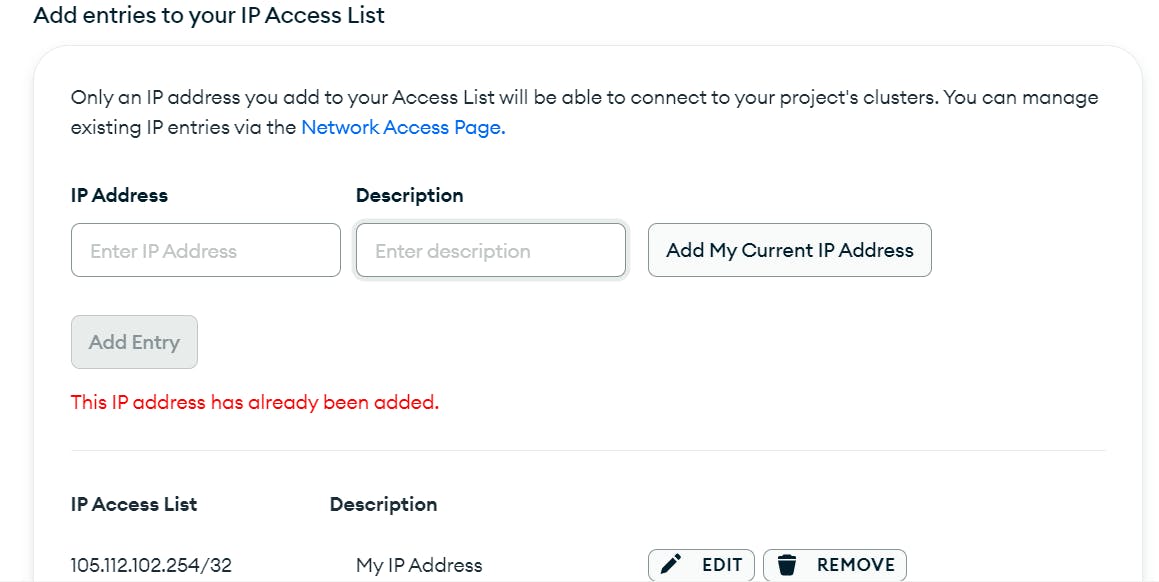
Click on the "Add My Current IP Address" button, It automatically does that for you.
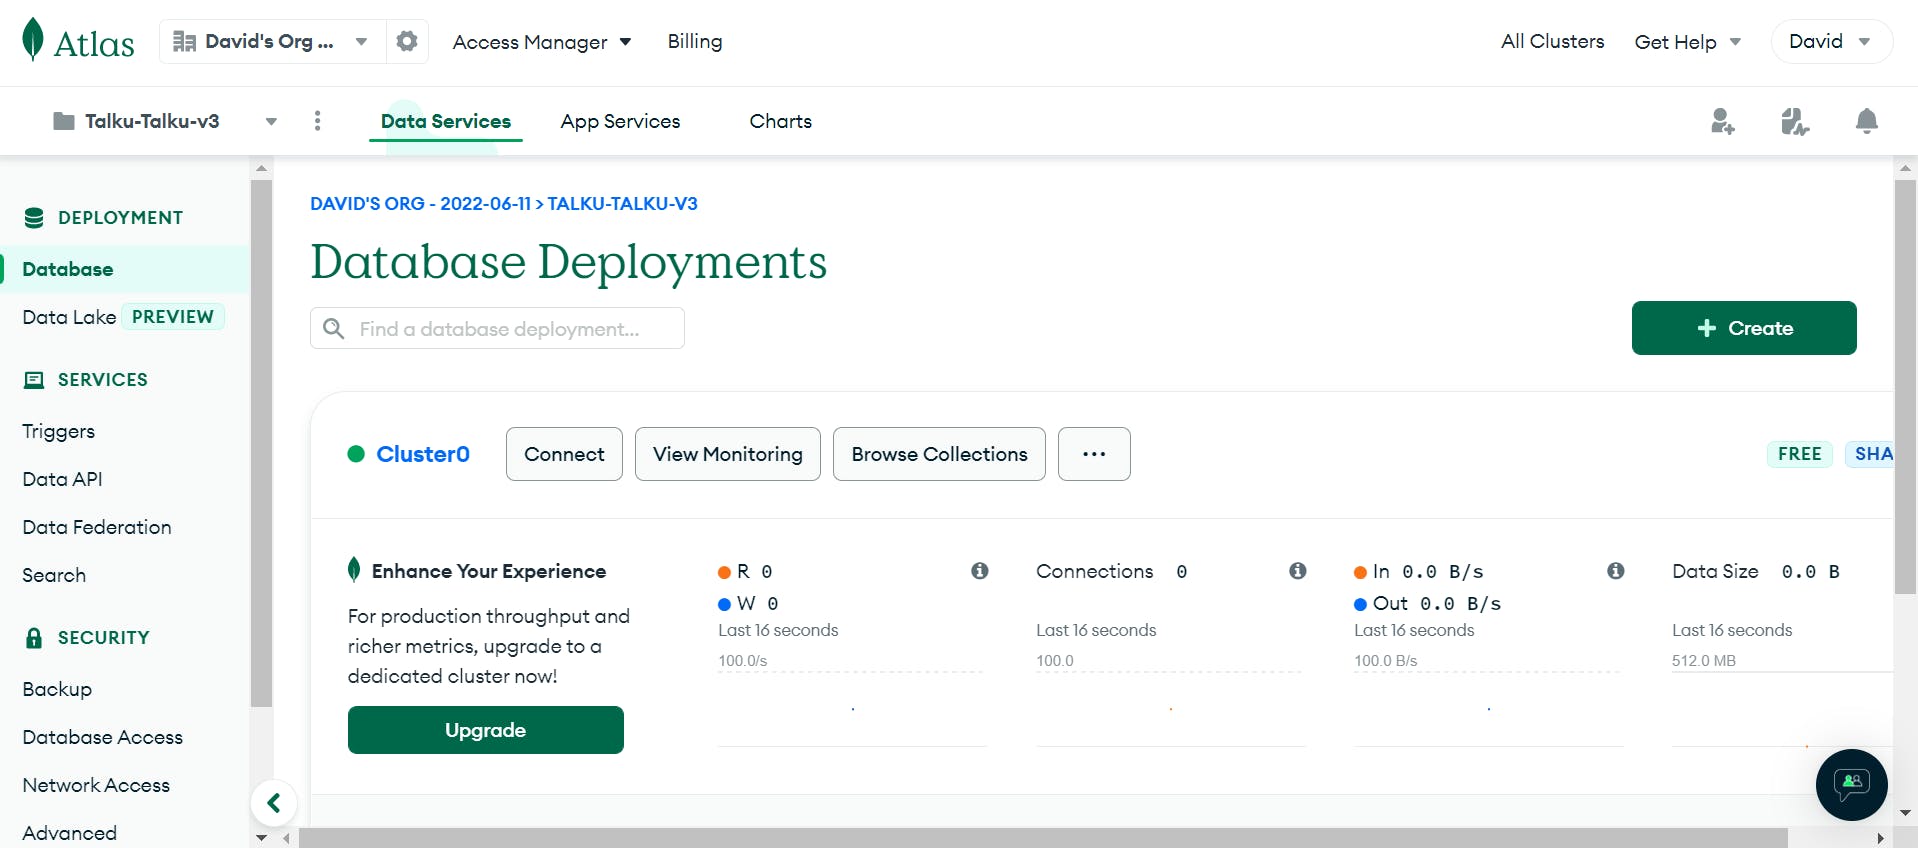
Voila!!!🎉 It might take a few seconds but your Database is on its way to wrap up and has been created already.
Step 5: Add Some Very Very Very Important Decorations🗝
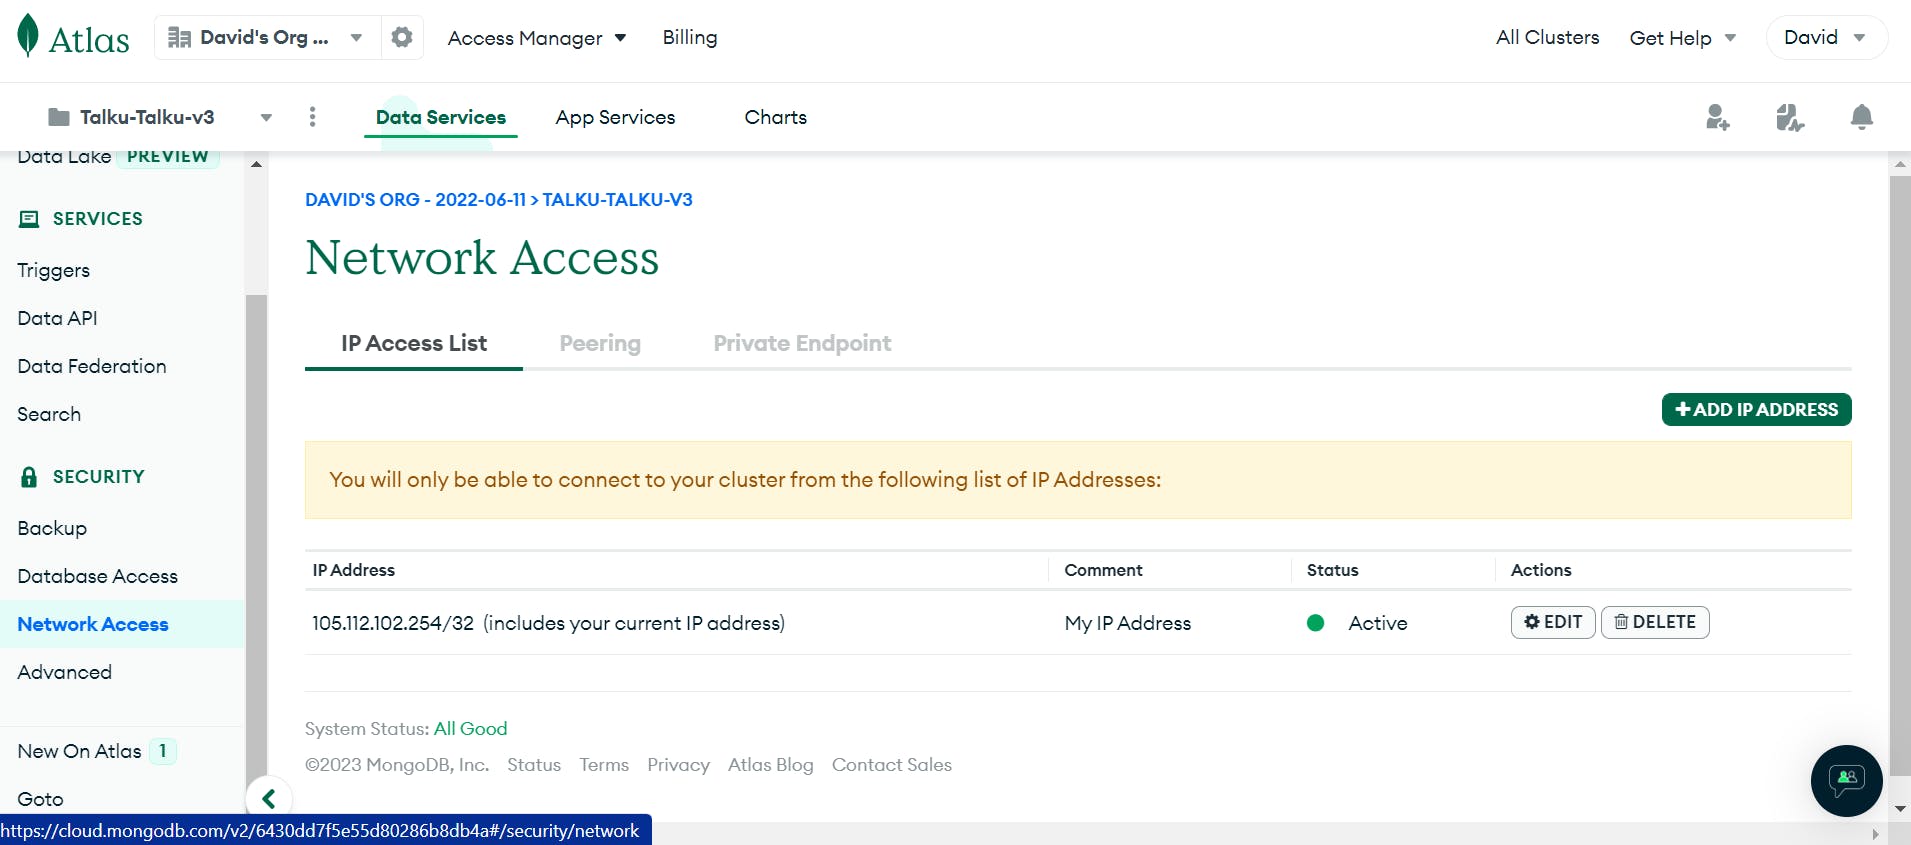
Now that your sandcastle is built, it's time to add some very important decorations to make it your own. In MongoDB Atlas, This means before we go to connect button, we go to network access on the security section on the sidebar, and then we click on "ADD IP ADDRESS", Notice, we already have one active from the one added previously.
Next we click "ALLOW ACCESS FROM ANYWHERE", makes it easier for us to connect to different hosting platforms and to avoid hosting issues later on in production.
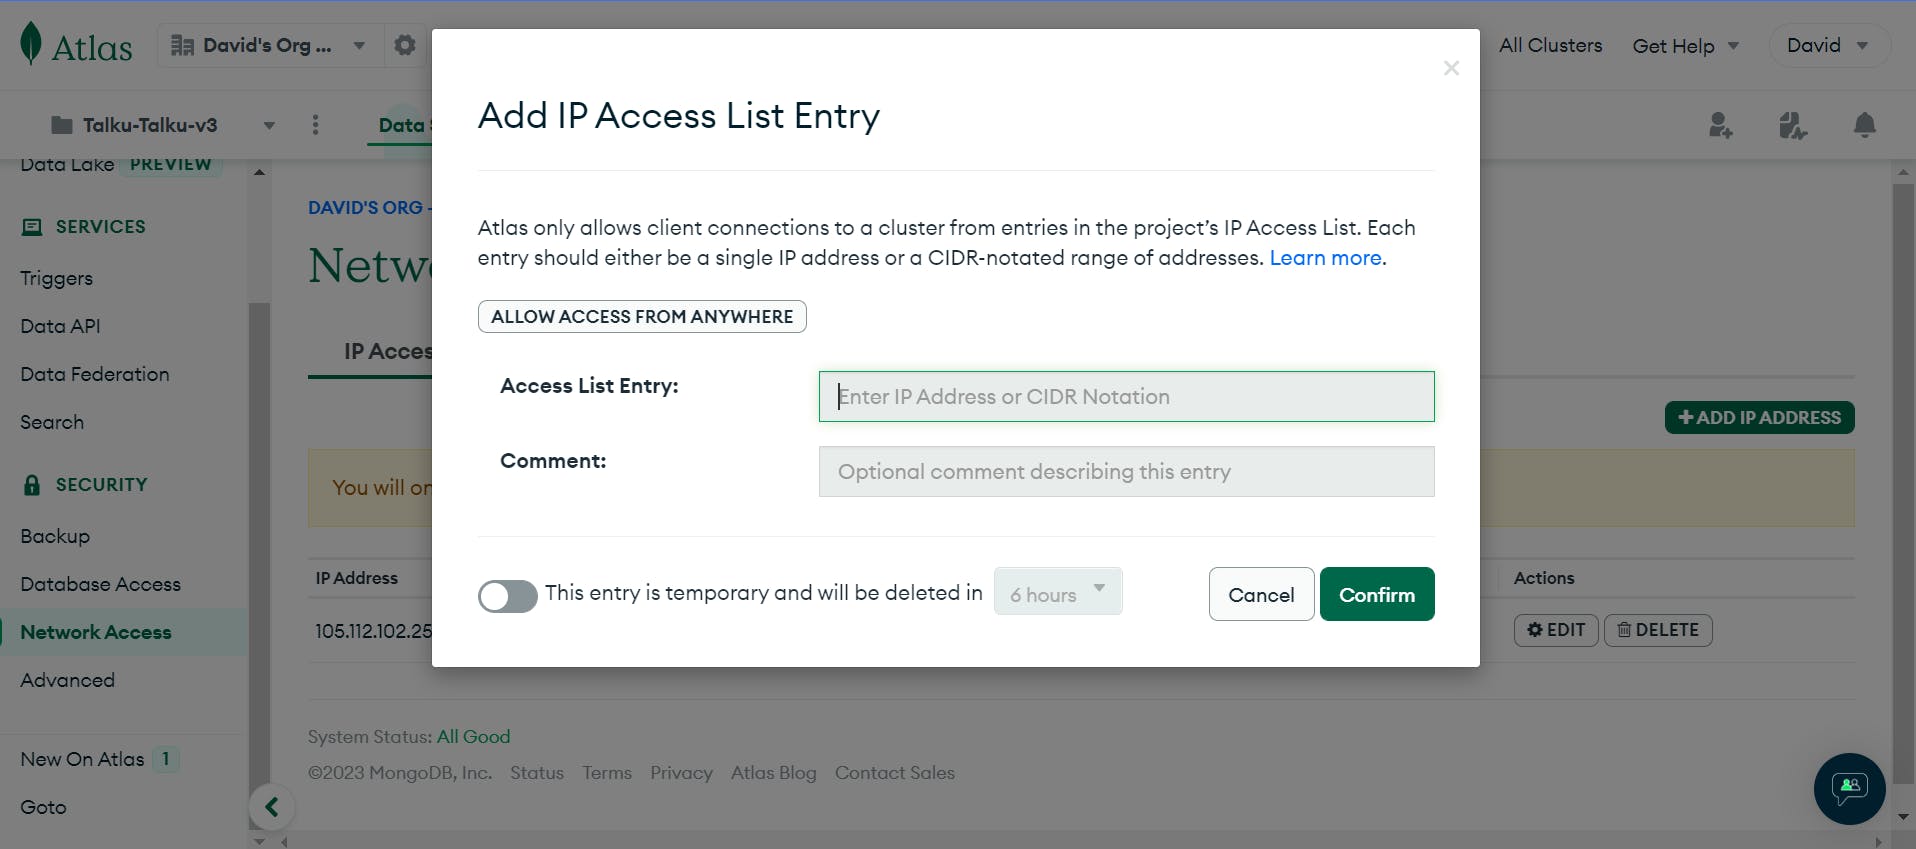
Confirmo!! 𓀀
Step 6: Connect Your Sandcastle to the World
Finally, it's time to connect your sandcastle to the world. In MongoDB Atlas, this means connecting your database to your application. Go to the "Database" tab, select your database, and click "Connect." Then choose the method of connection that works best for your needs, such as connecting via Node.js.
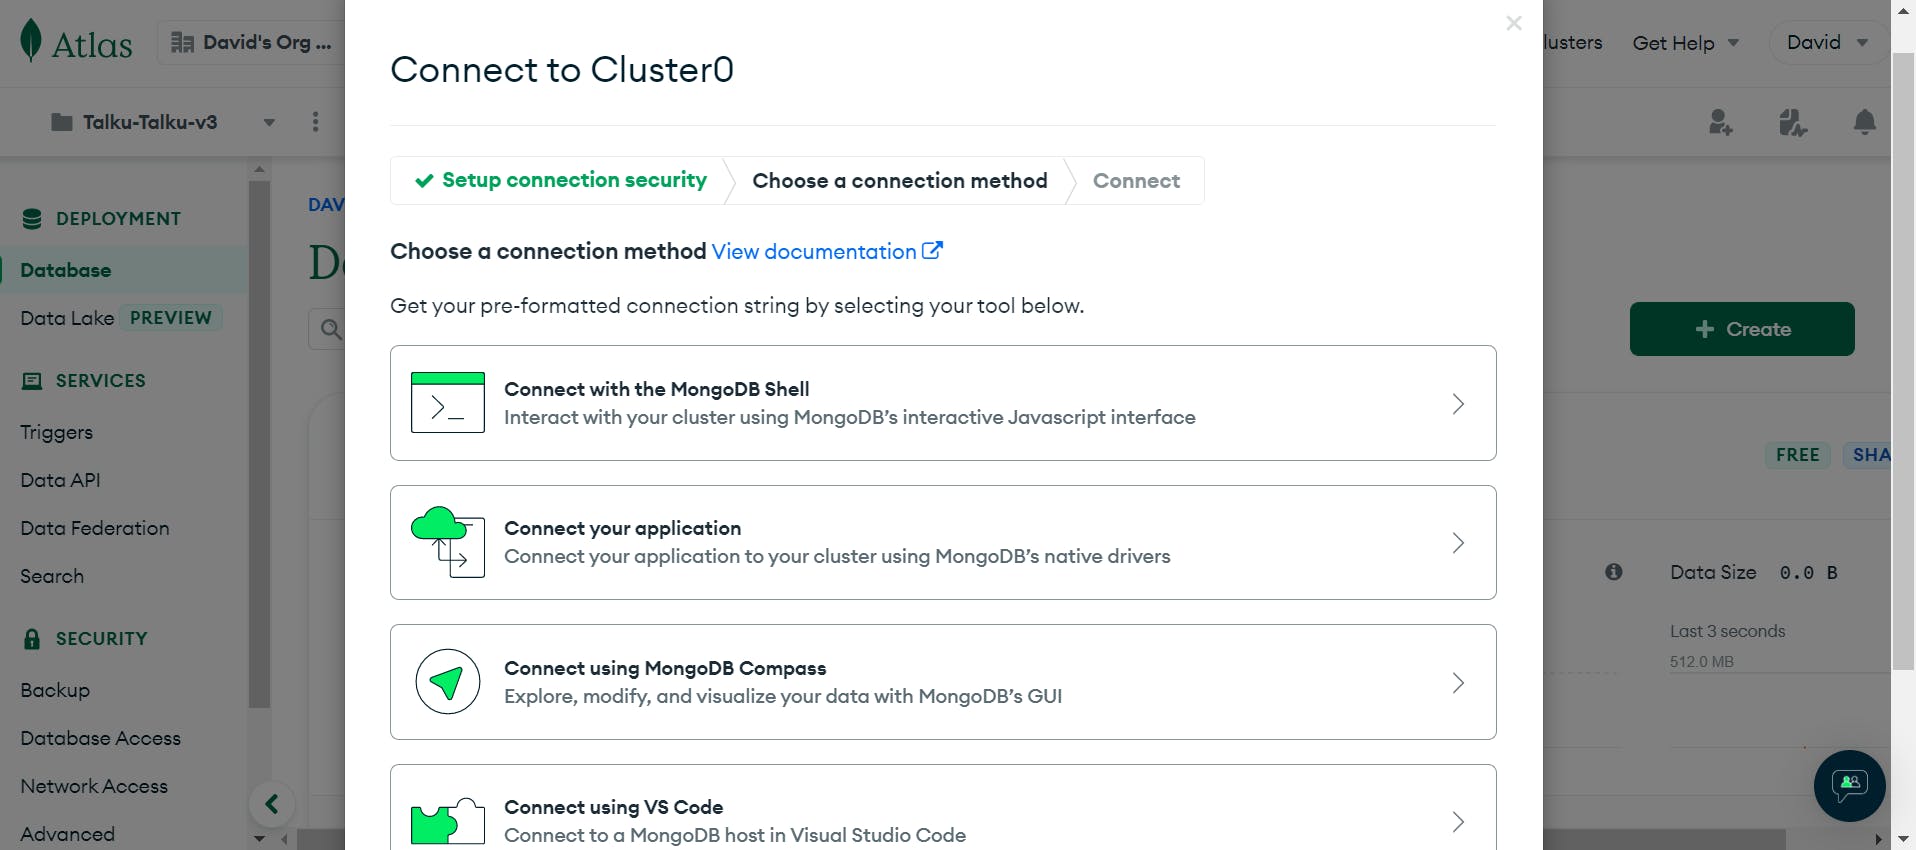
In this case, we would be connecting via Application. It's most times the case per se.
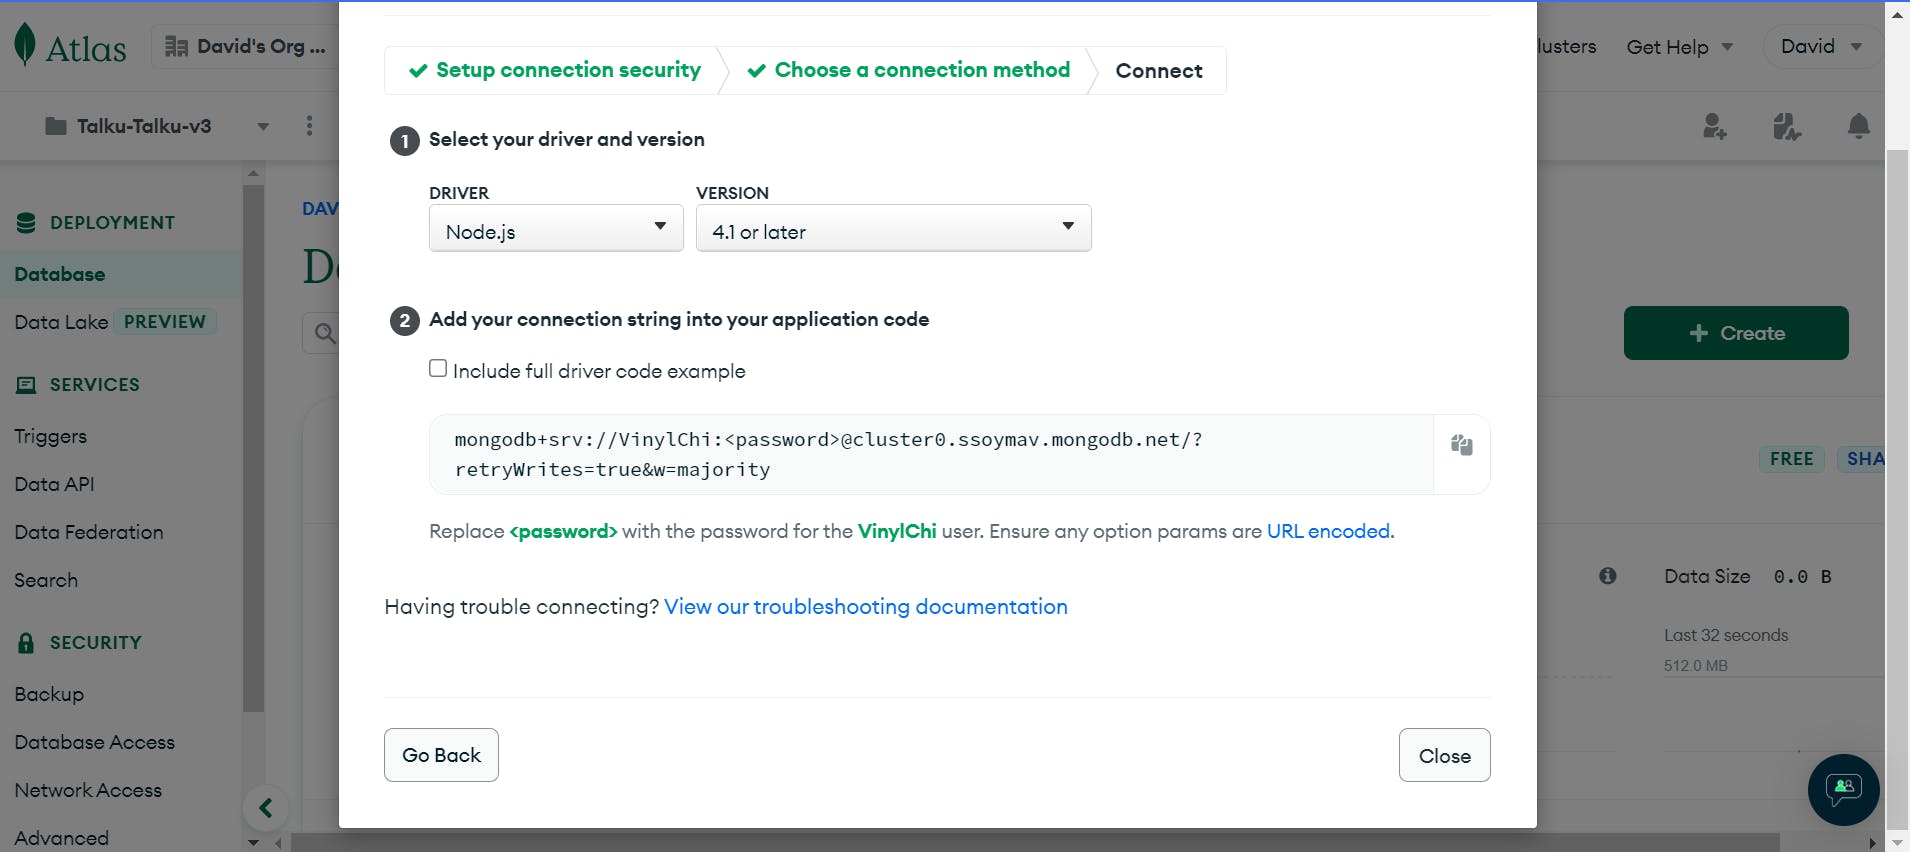
Then copy your URL link and paste in your express server directly or paste in you .env file pointing to the MONGO_URL like this for example.
PORT=5000
MONGO_URL="mongodb+srv://VinylChi:<password>@cluster0.ssoymav.mongodb.net/?retryWrites=true&w=majority"
Note: Remember to replace your username and password in the link with yours.
Now, Spin up your server again after connecting the MONGO_URL in express with mongoose. Trust me that's basically all you need. Then you should have something like this.
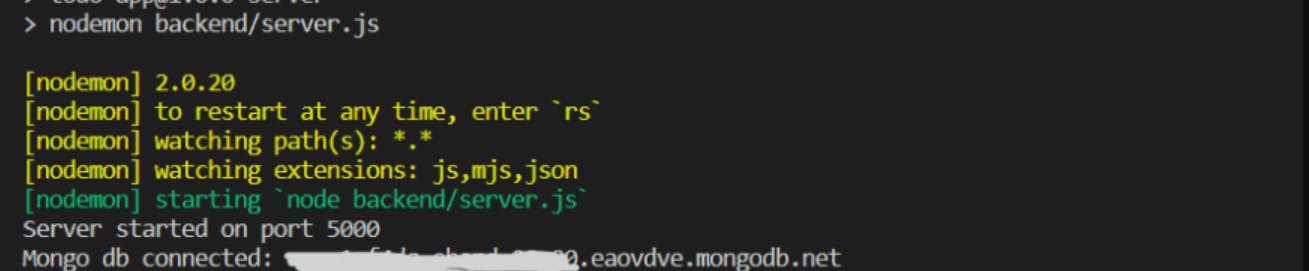
And there you have it!🎊 Building a database in MongoDB Atlas is just like building a sandcastle on the beach; it requires creativity, imagination, and a little bit of patience. But once you've put in the work, you'll have a beautiful and functional sandcastle (or database) that you can be proud of!
Share your thoughts and connect with me everywhere for more writings and thoughts like this, It's the least you can do.🫂
Merci!!!